Docker - Jenkins, Gitlab
K8S - argocd
springboot
maven
Dockerdescktop - kubernetes
Spring 프로젝트 생성
https://start.spring.io
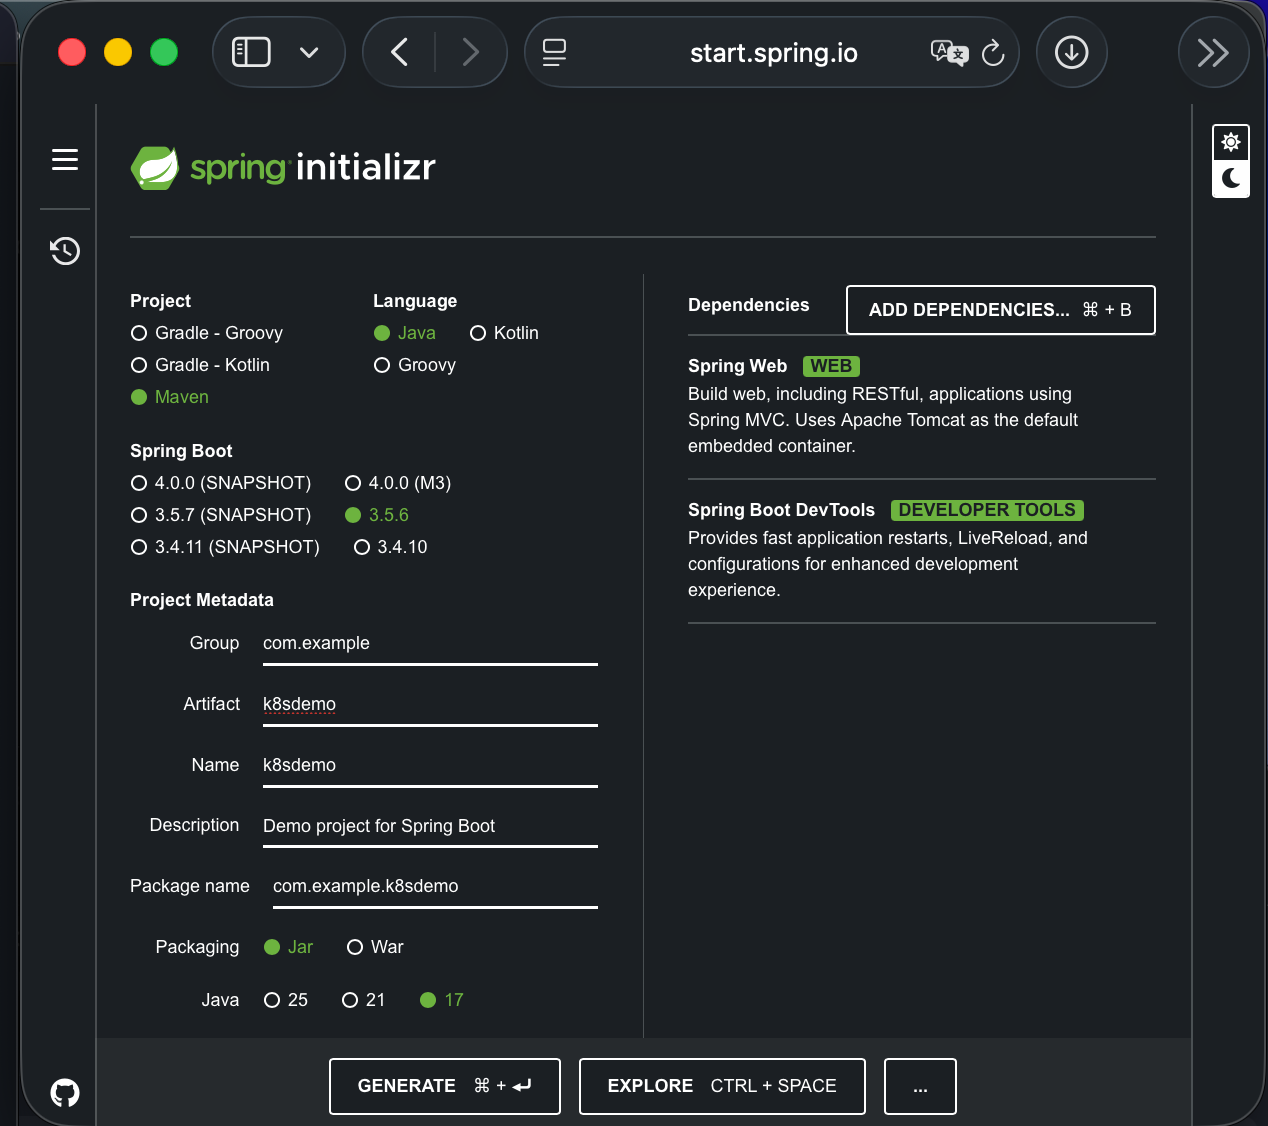
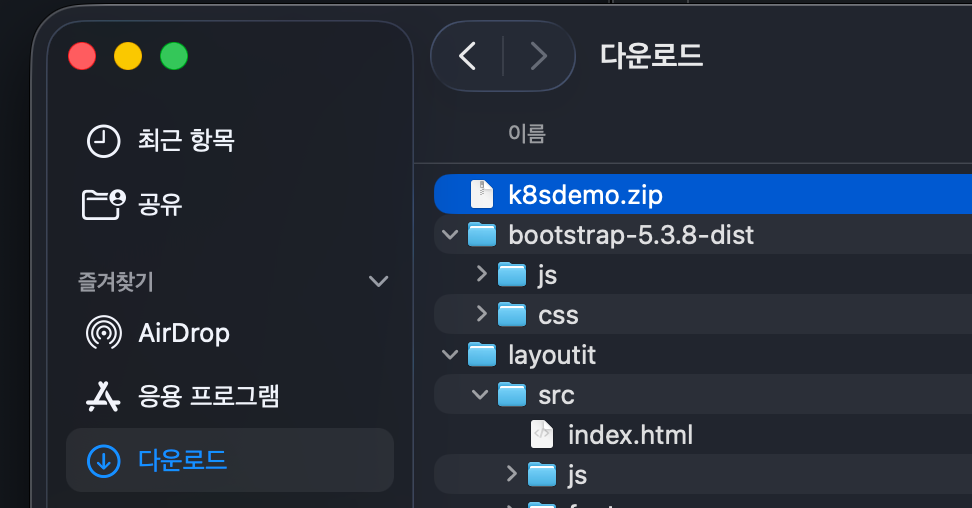
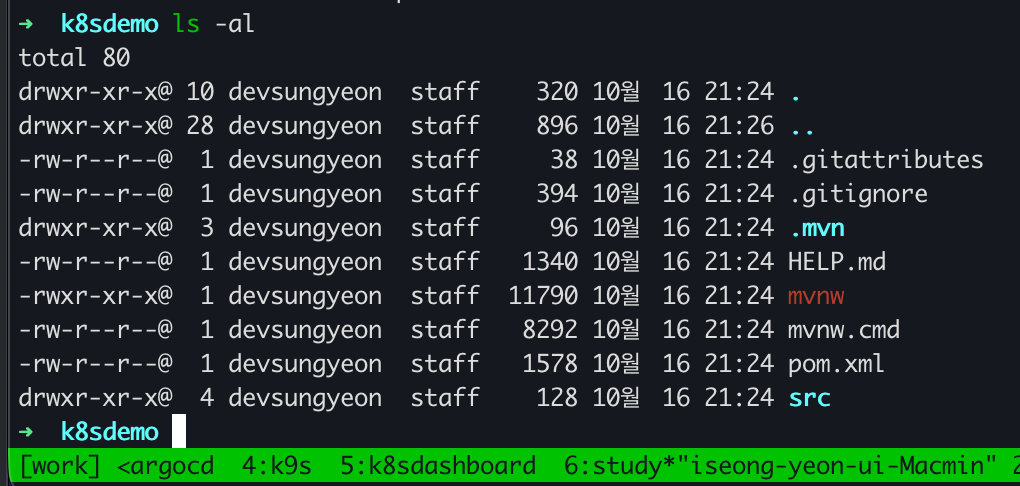
git init
git commit -m 'init'
Docker 내 gitlab 설치
docker-compose.yml 파일 사용
services:
  gitlab:
    image: gitlab/gitlab-ce:latest
    container_name: gitlab
    hostname: gitlab
    restart: always
    ports:
      - "8929:8929"   # Web UI
      - "2224:22"     # SSH for git clone
    environment:
      TZ: Asia/Seoul
      GITLAB_OMNIBUS_CONFIG: |
        external_url 'http://localhost:8929'
    volumes:
      - ./config:/etc/gitlab
      - ./logs:/var/log/gitlab
      - ./data:/var/opt/gitlab
    extra_hosts:
      - "jenkins.local:host-gateway"
    networks:
      - cicd-net

networks:
  cicd-net:
    external: true
**networks는 jenkins와 gitlab 동일 네트워크로..**
docker gitlab 설치
docker compose up -d

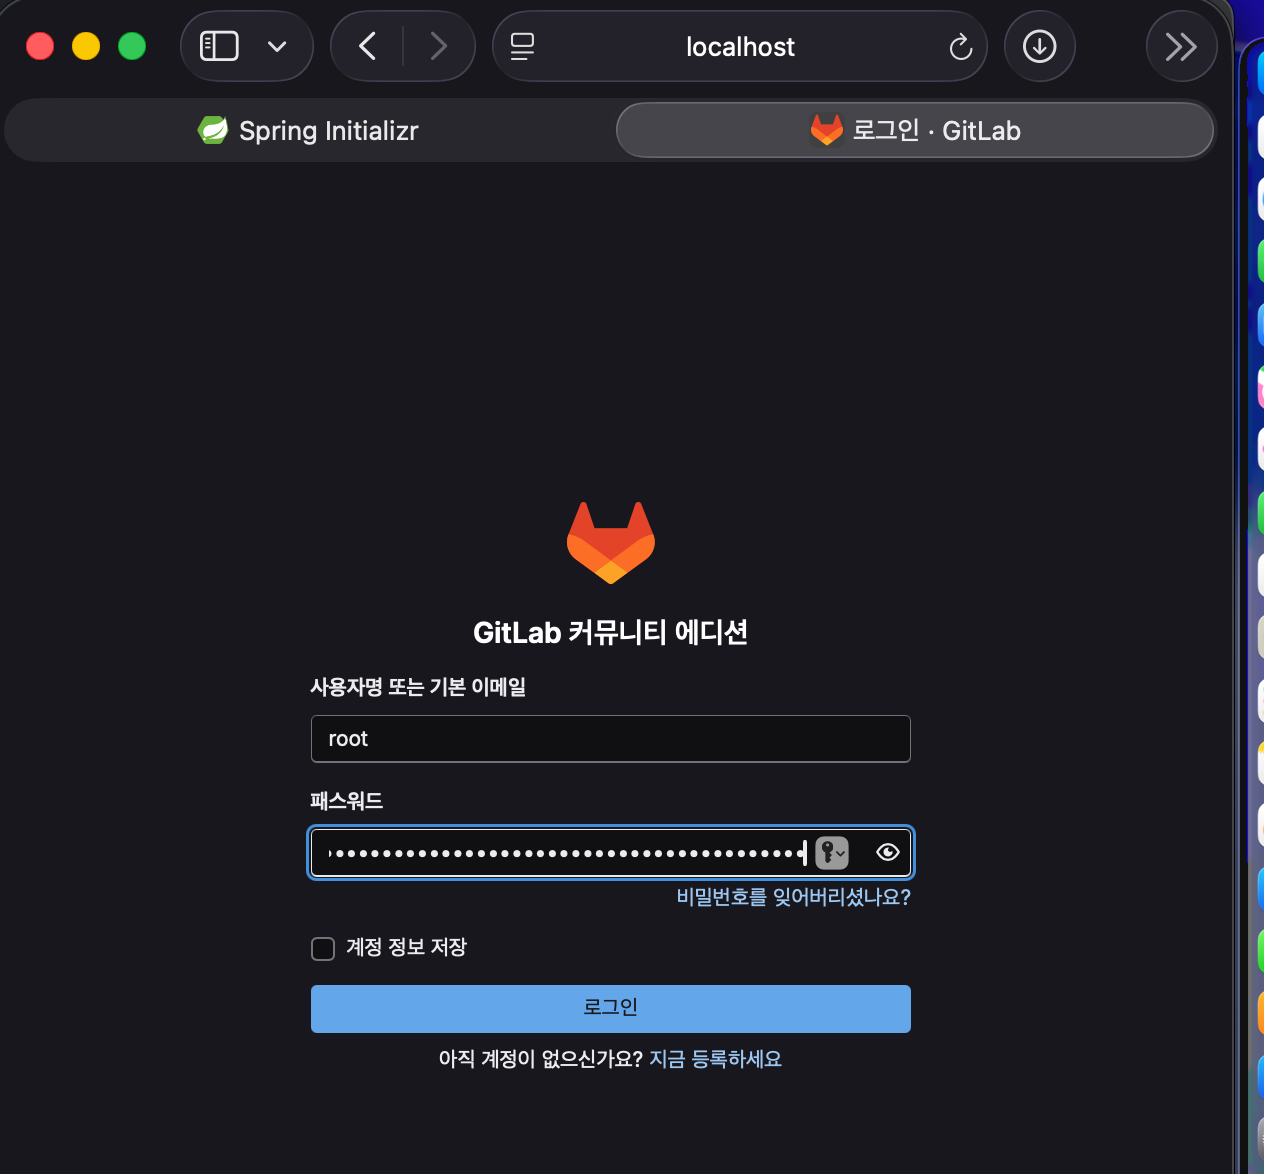
Gitlab 초기 관리 계정 : root
gitlab 초기 관리 비번 : /etc/gitlab 혹은 로컬 볼륨 .config에서 확인
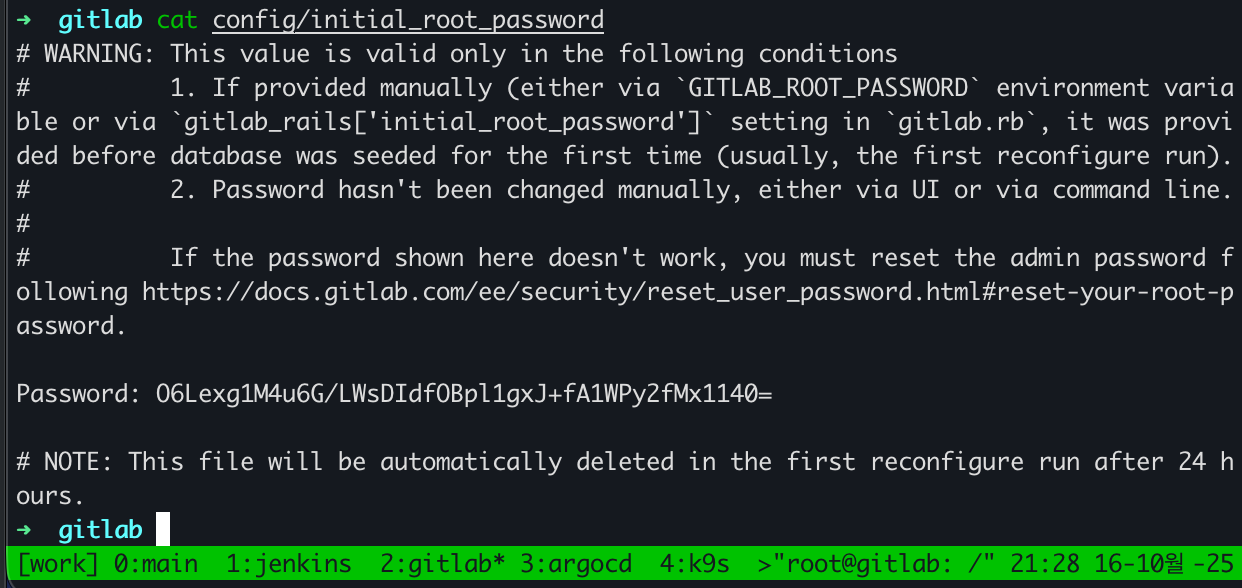
http://localhost:8929 로 접속 가능.
root / O6Lexg1M4u6G/LWsDIdfOBpl1gxJ+fA1WPy2fMx1140=
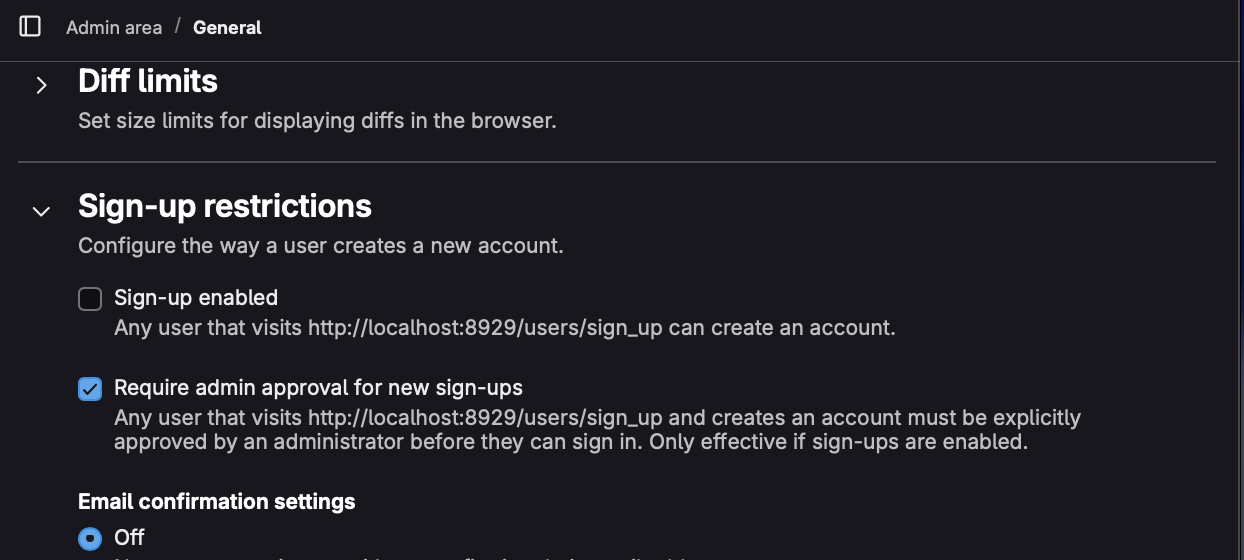
가입정책 변경 - 체크박스 해제
Sign-up enabled
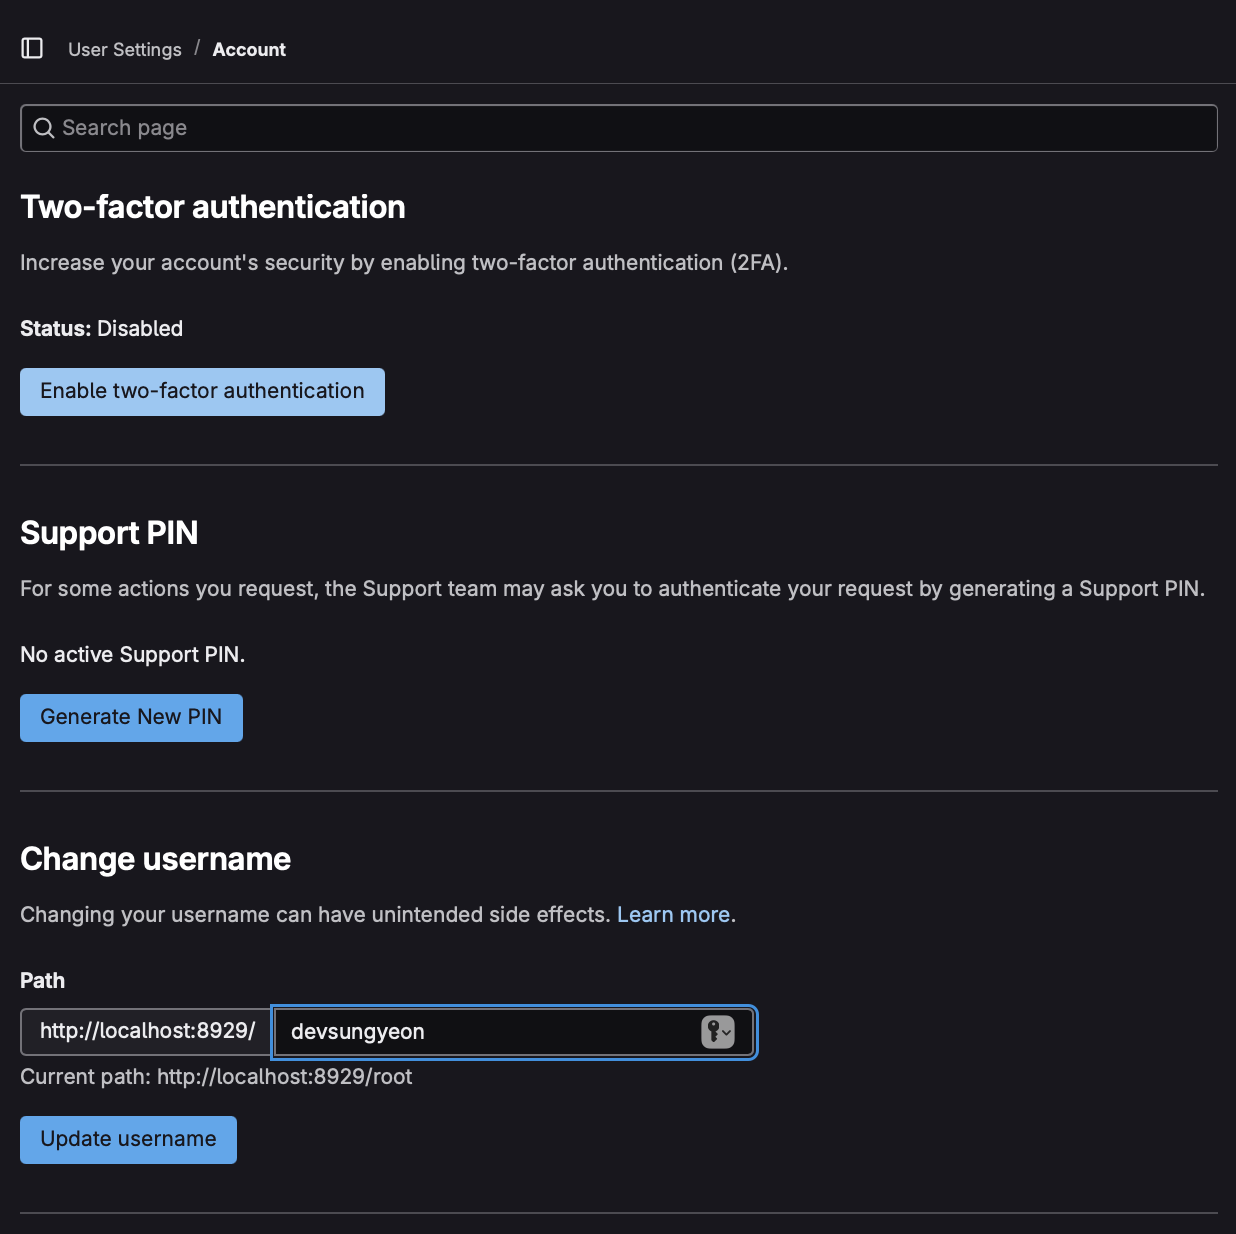
계정명 변경
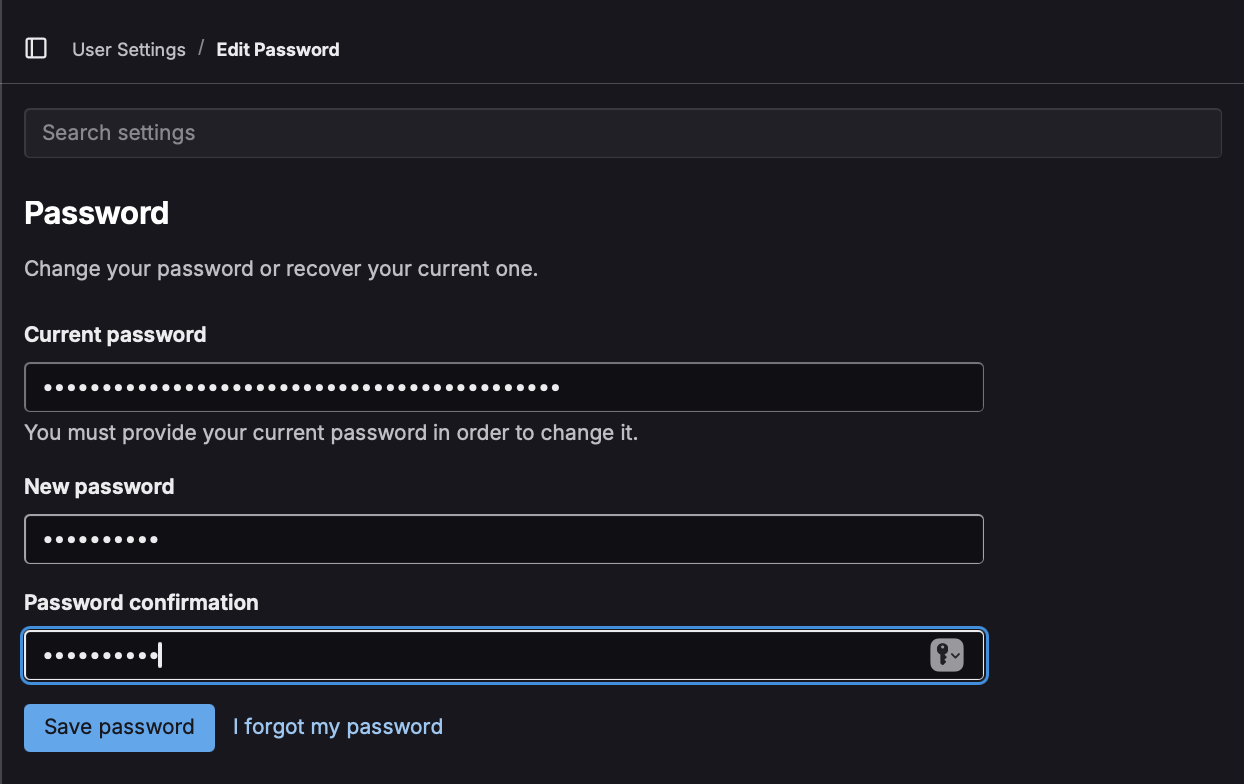
비밀번호 변경
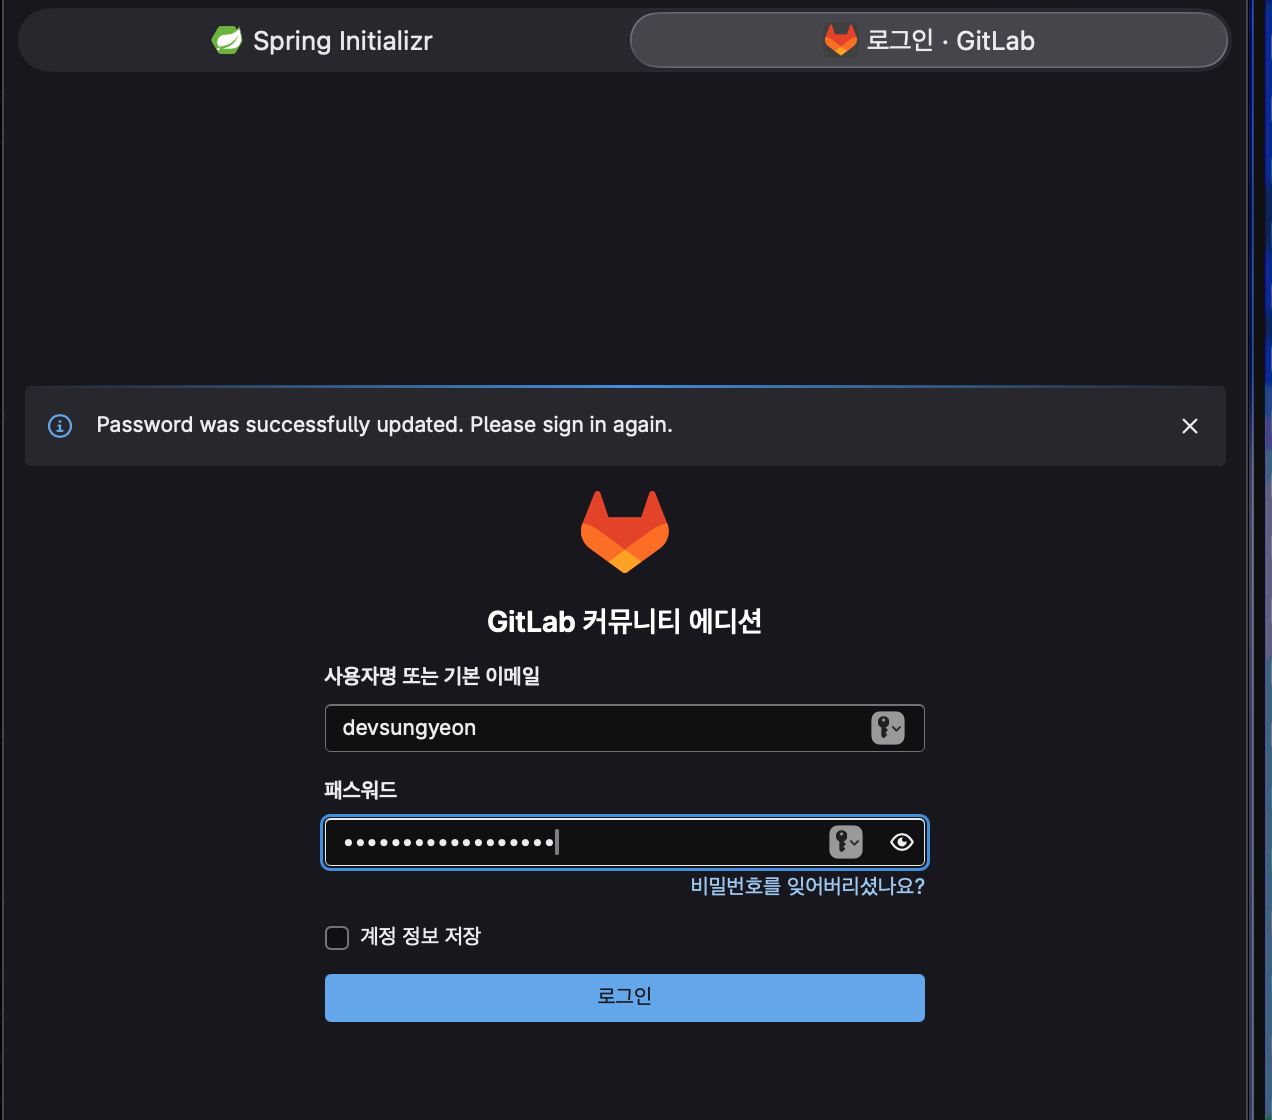
재로그인
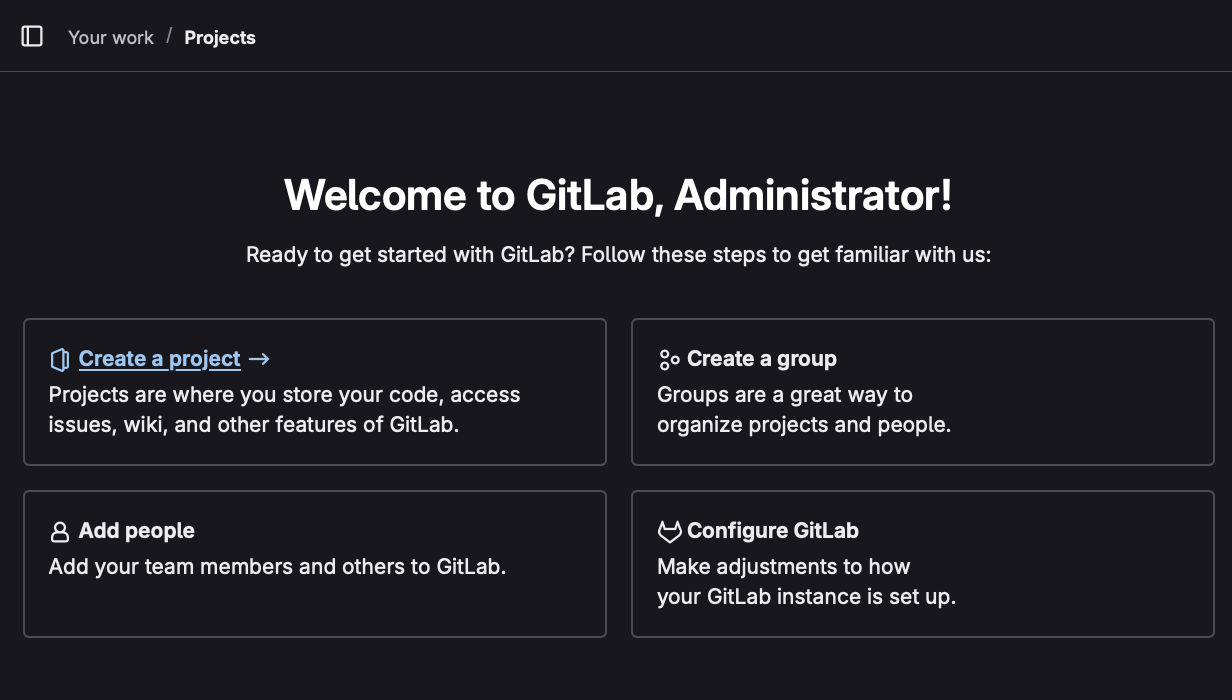
프로젝트 생성
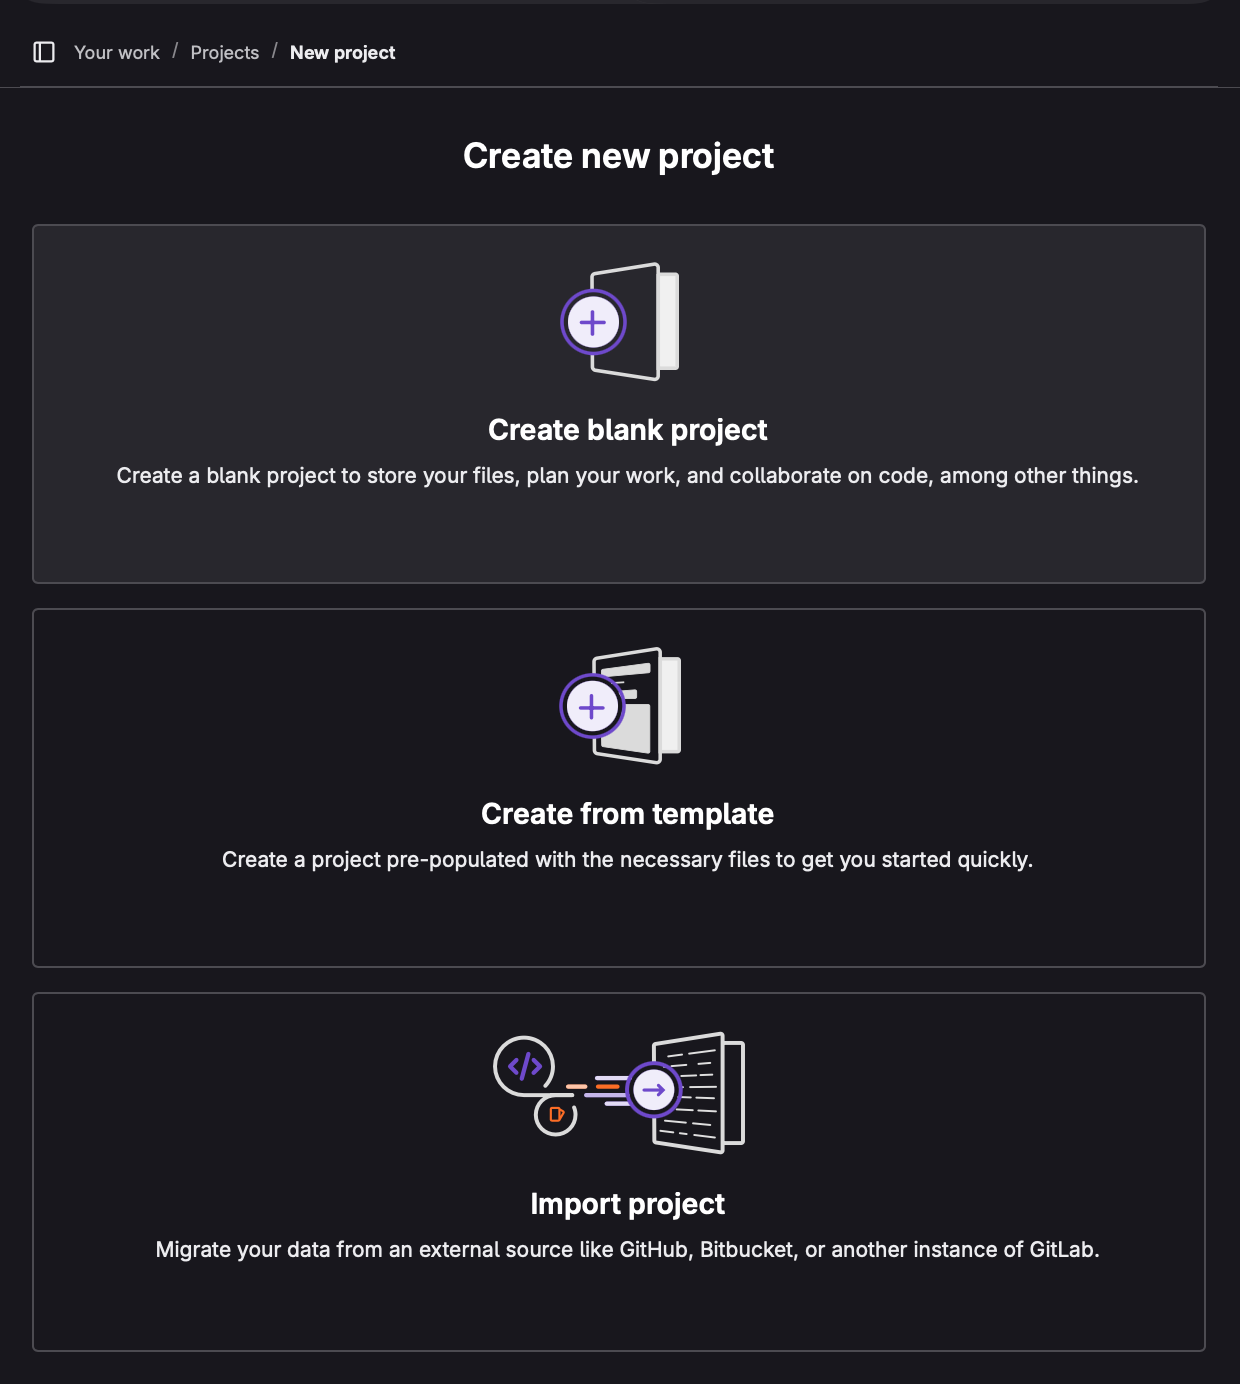
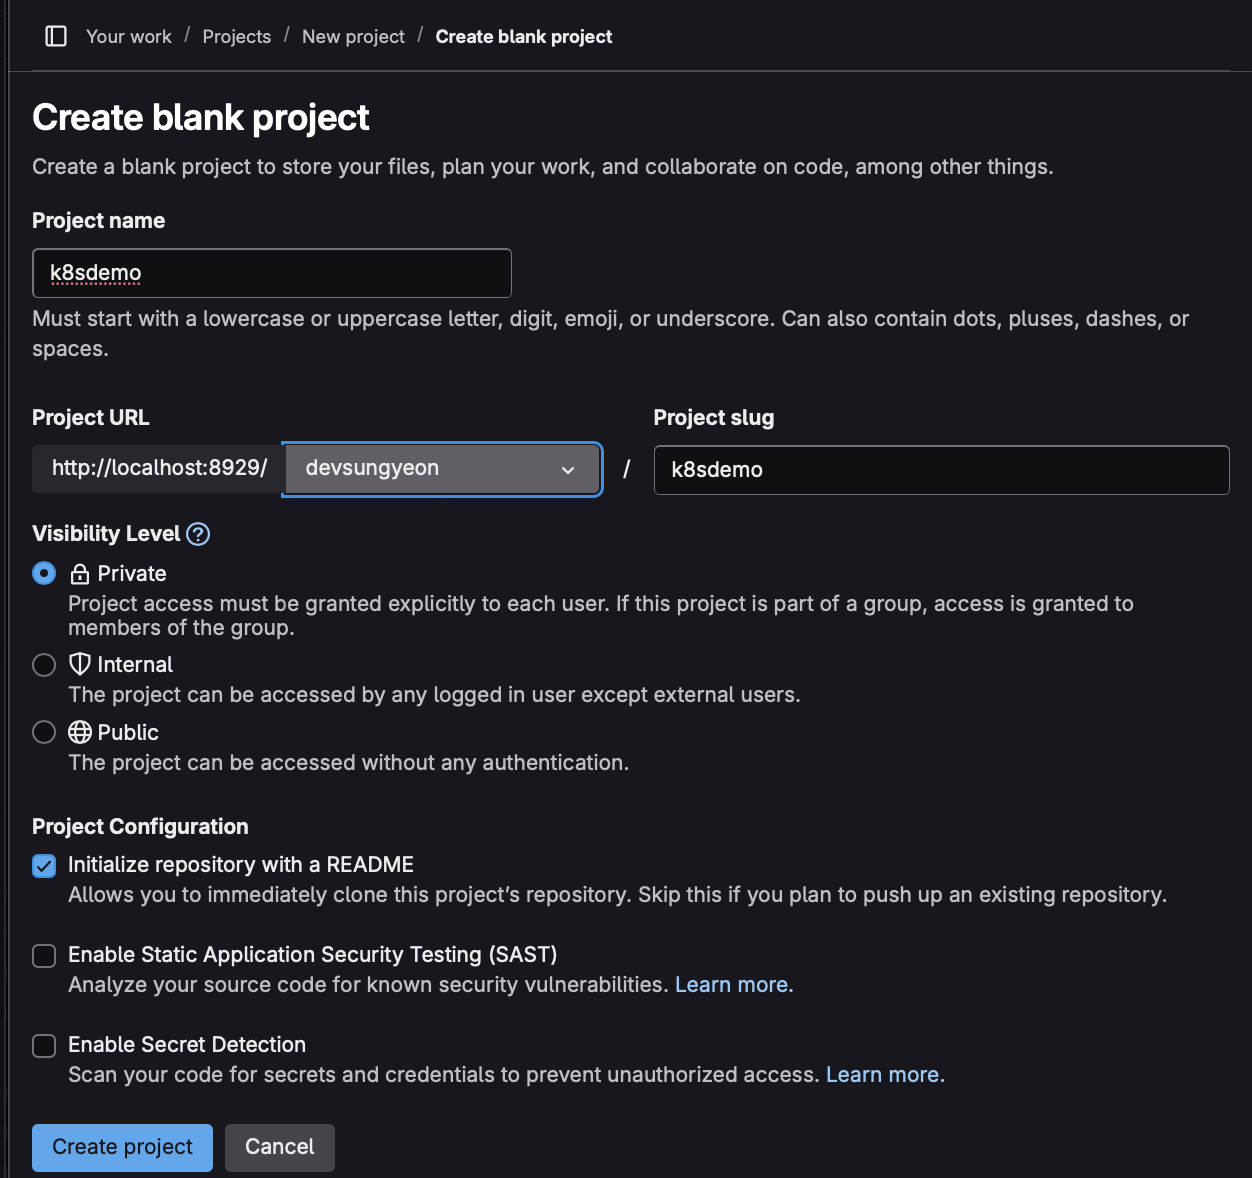
공백 프로젝트 생성
로컬 pc ssh key 생성 : ssh-keygen 이용
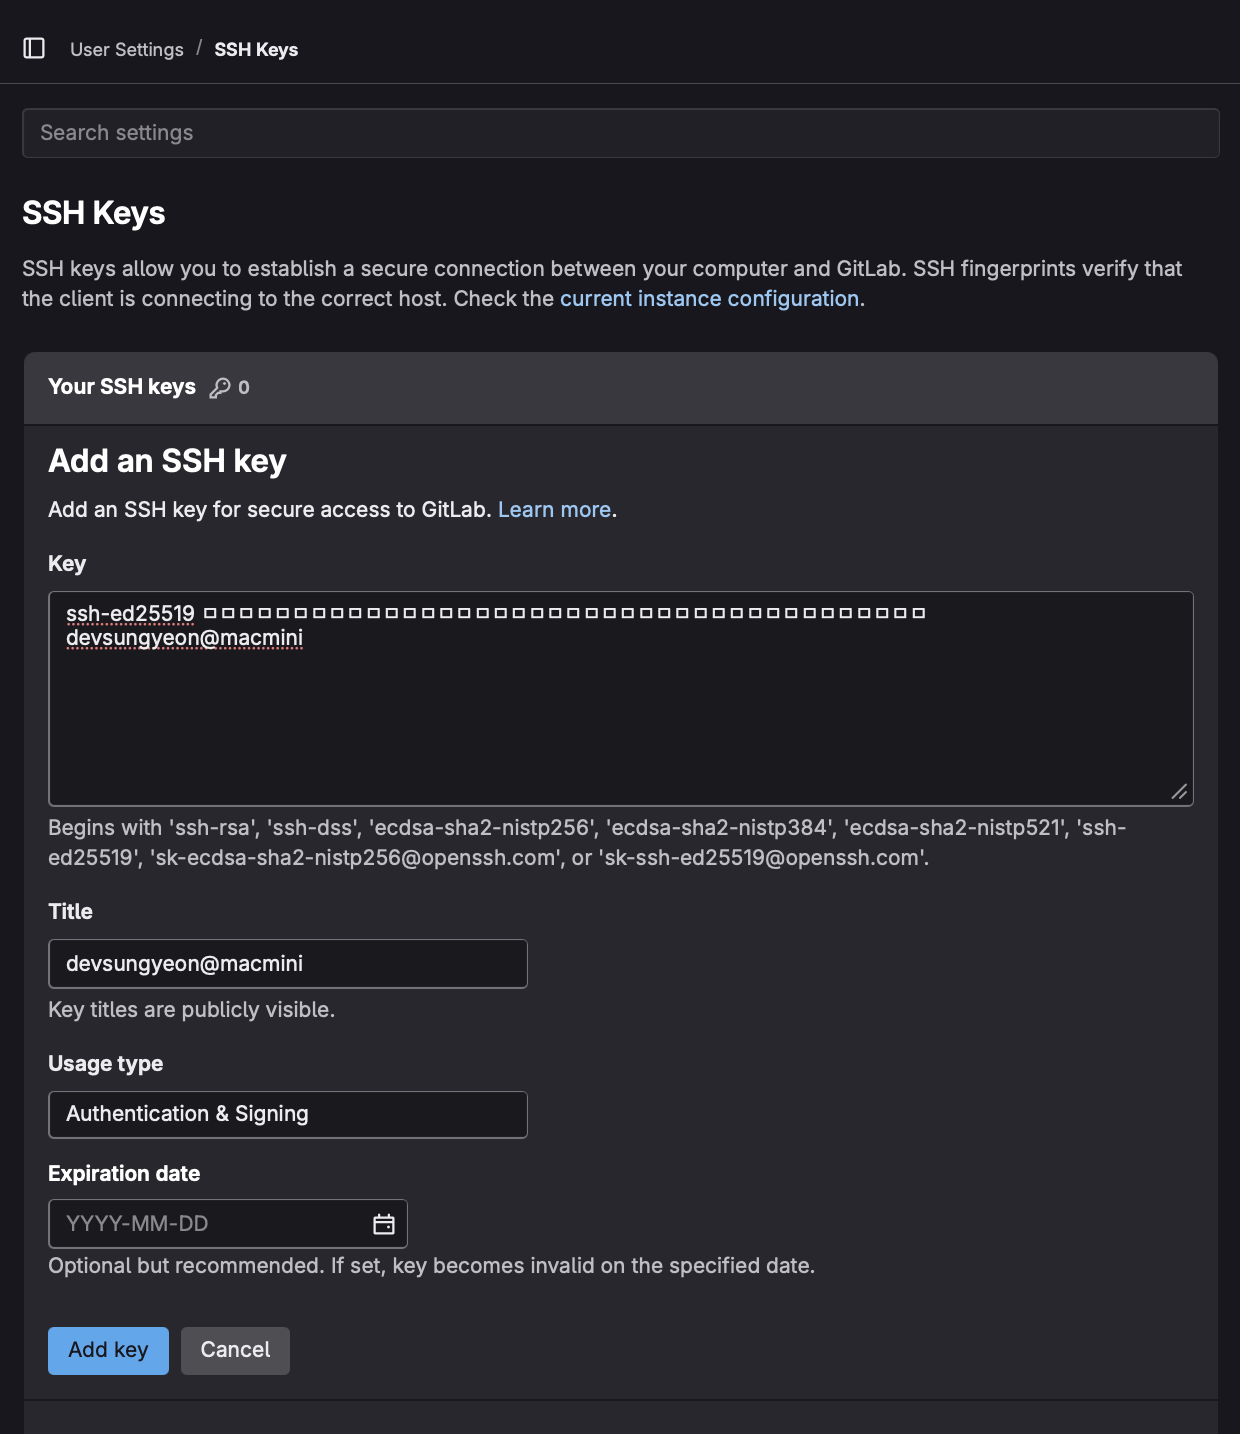
계정에 로컬 pc SSH 키 등록
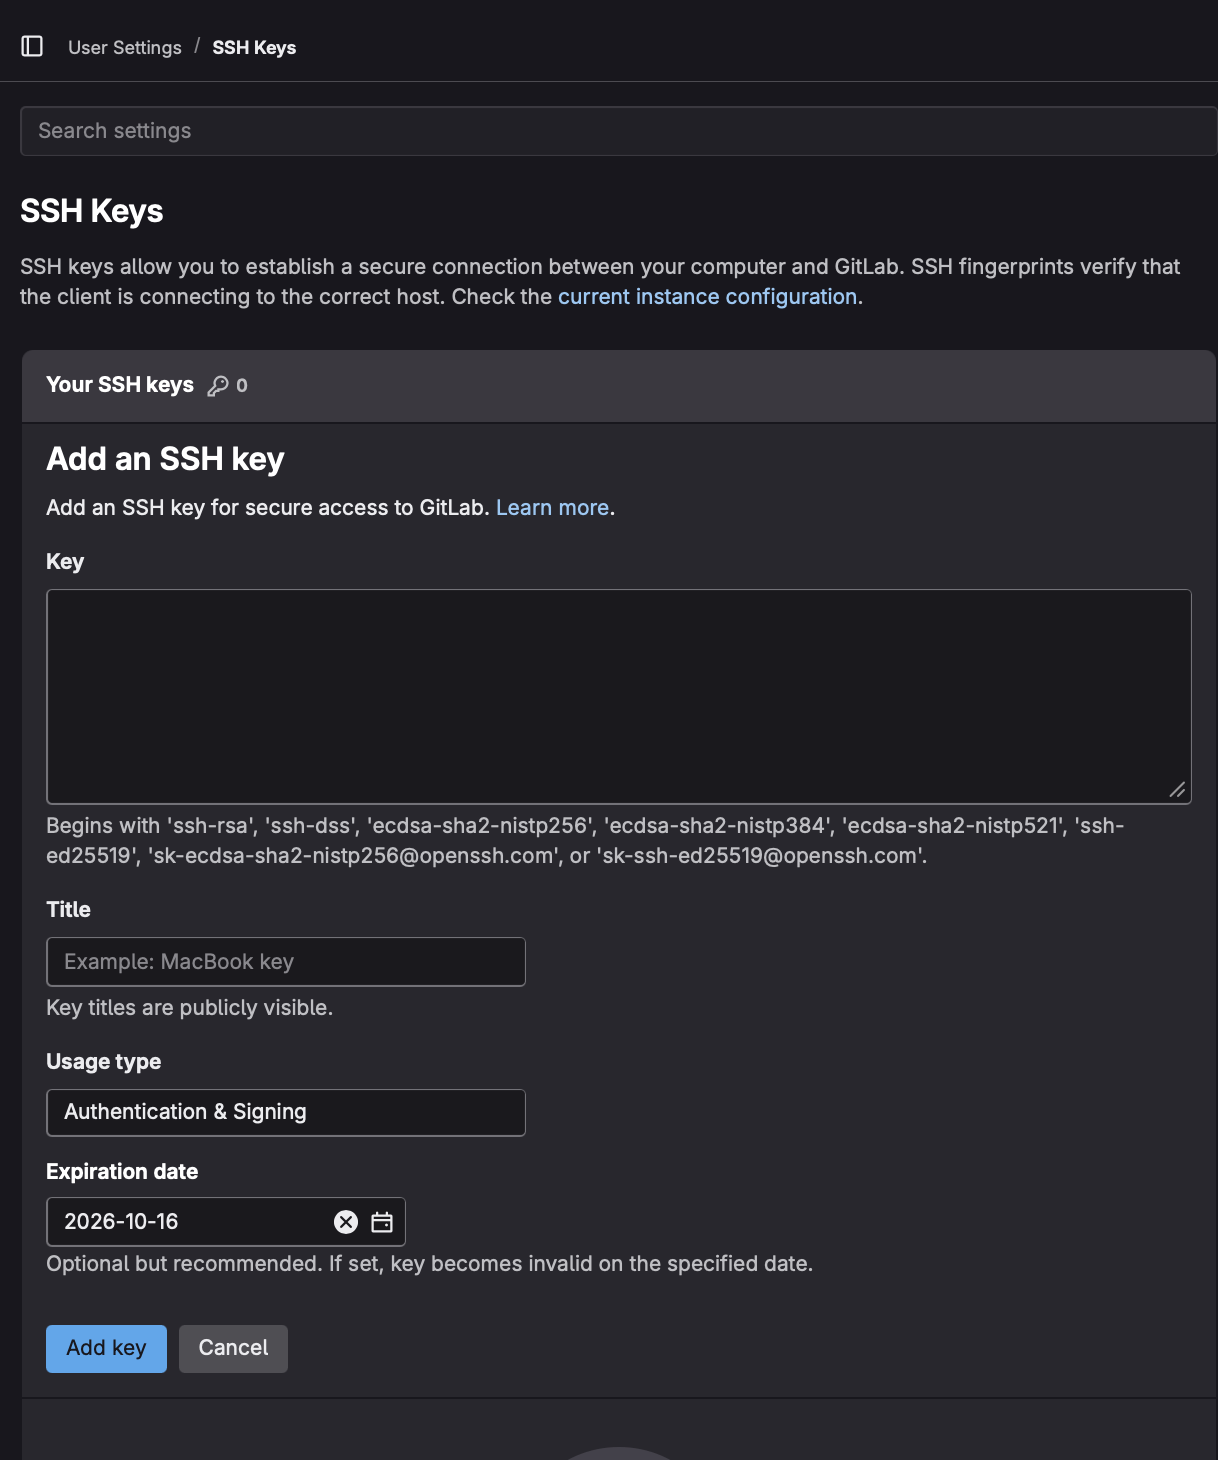
로컬 .ssh 에서 사용할 pub 키를 gitlab에 등록.
cat ~/.ssh/{name}.pub
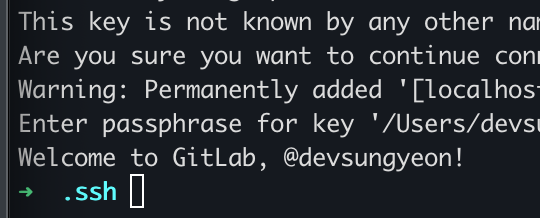
연결 테스트(localPC에서 Docker Gitlab으로) :
ssh git@localhost -p 2224
알고리즘 기본 이름이 아닌, 다른 이름으로 지정했을 경우,
-
ssh git@localhost -p 2224 -i /root/.ssh/id_jenkins
Spring 프로젝트와 연결

git remote add origin ssh://git@localhost:2224/devsungyeon/k8sdemo.git

git pull 시, 충돌 발생하면,
강제로 병합 허용 : git pull origin main –allow-unrelated-histories
git push
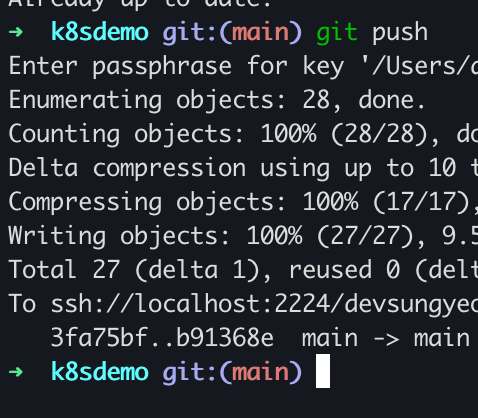
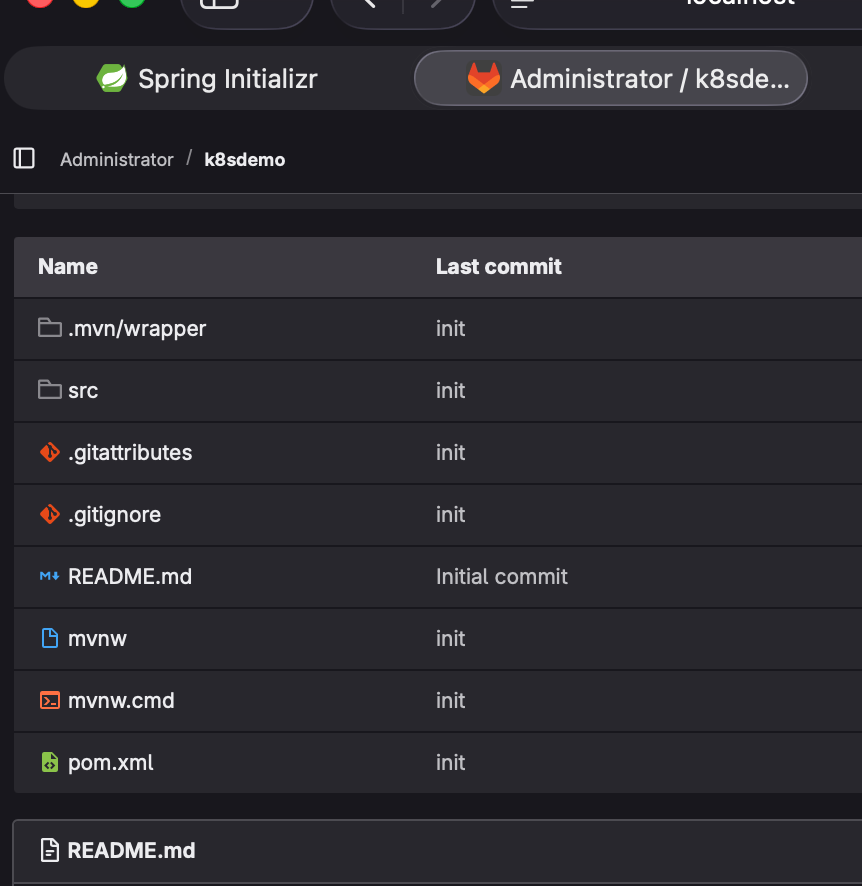
push 확인
Docker 내 Jenkins 설치

Dockerfile
Dockerfile 사용 이유는 기본 Jenkins 이미지에는 docker CLI가 없음.
따라서 해당 이미지에 docker 설치후, 다시 빌드하여 사용.
# Dockerfile
FROM jenkins/jenkins:lts-jdk17

USER root

# Docker CLI 설치
RUN apt-get update && \
    apt-get install -y docker.io && \
    apt-get clean

# docker 그룹 접근 허용 (root는 이미 가능하지만 안전하게)
RUN usermod -aG docker root

# Jenkins home 유지
VOLUME /var/jenkins_home

EXPOSE 8080 50000
docker-compose.yml 파일 사용
services:
  jenkins:
    build: . # Dockerfile 사용?
    container_name: jenkins
    restart: always
    user: root
    ports:
      - "9090:8080"   # ← 외부 접속 포트 변경
      - "50000:50000"
    environment:
      - TZ=Asia/Seoul
    volumes:
      - ./jenkins_home:/var/jenkins_home
      - ./jenkins_ssh:/root/.ssh        # ✅ SSH 키 영구 저장
      - /var/run/docker.sock:/var/run/docker.sock
    networks:
      - cicd-net

networks:
  cicd-net:
    external: true
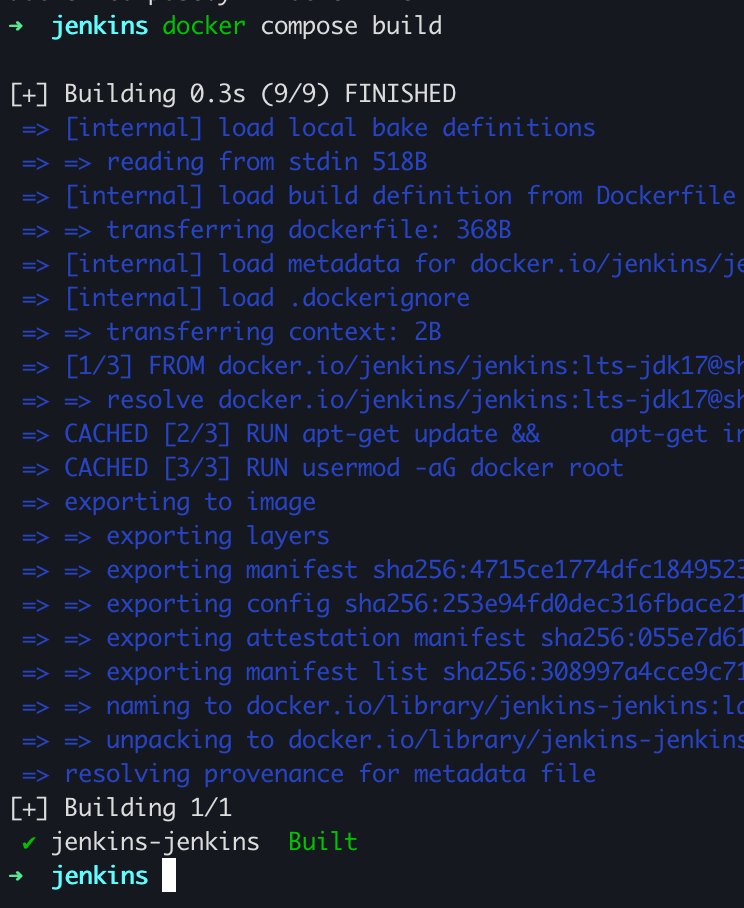
Dockerfile build
docker compose build
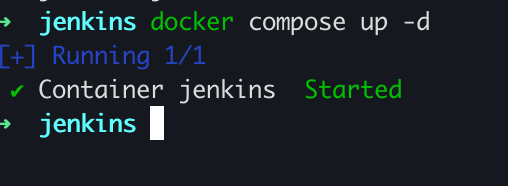
docker compose up
docker compose up -d
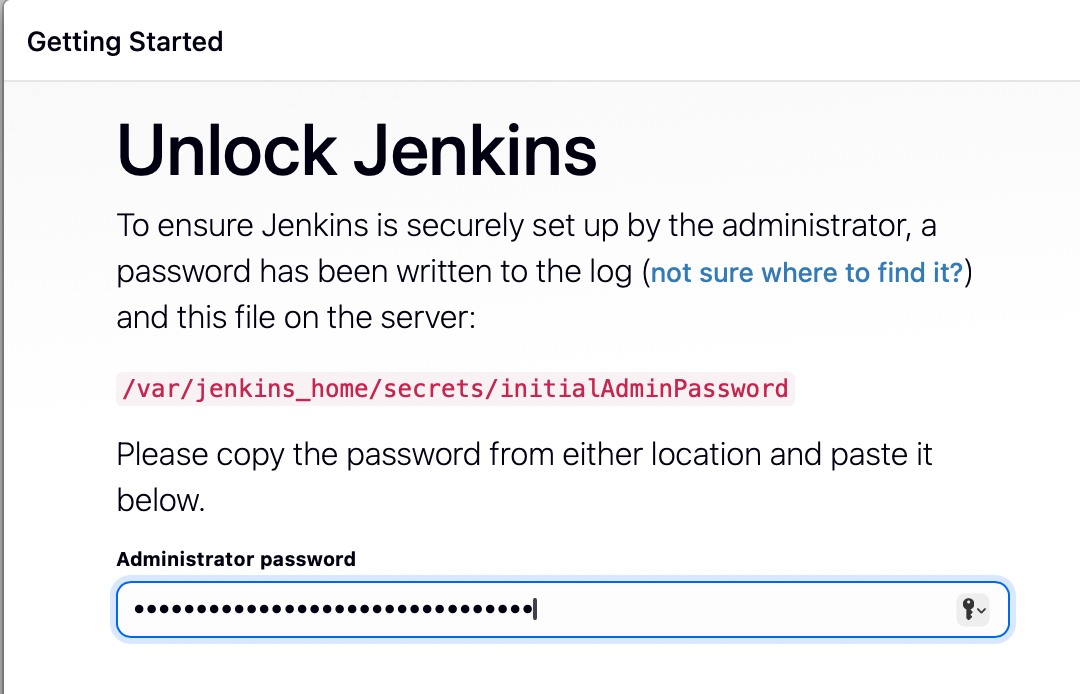
http://localhost:9090 로 접속 가능.
초기 비번 : ./jenkins_home/secrets/initialAdminPassword

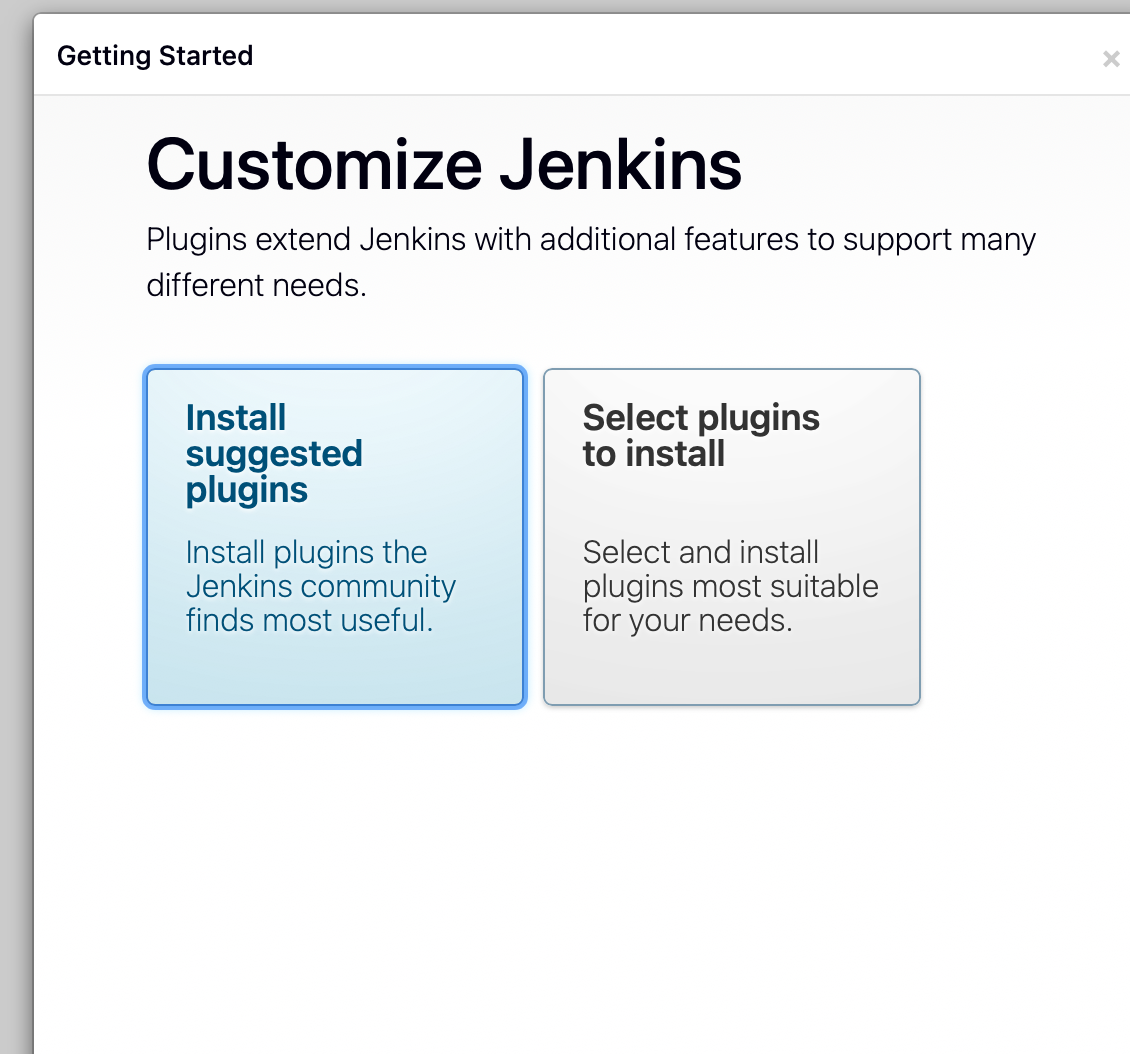
필수플러그인 설치
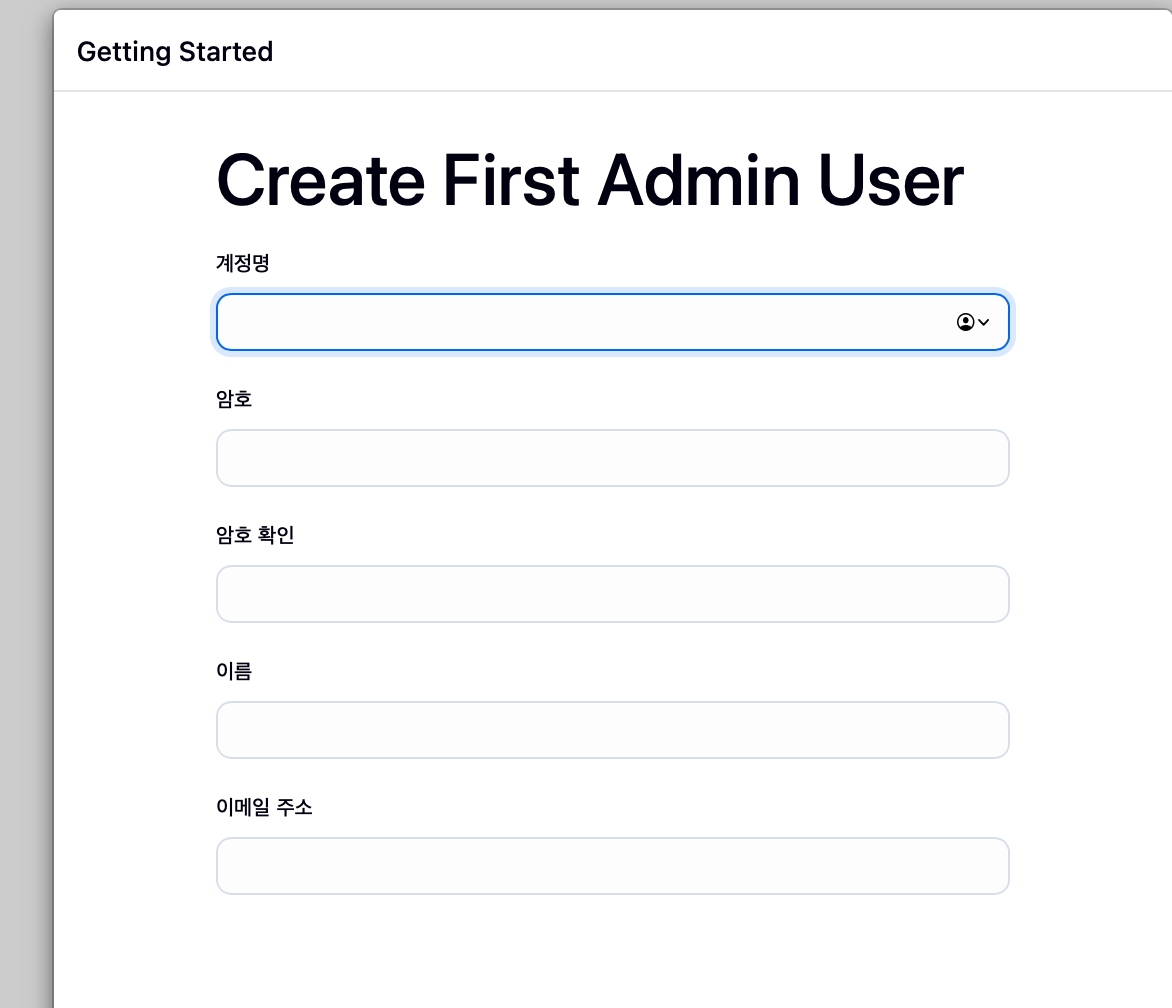
계정 생성
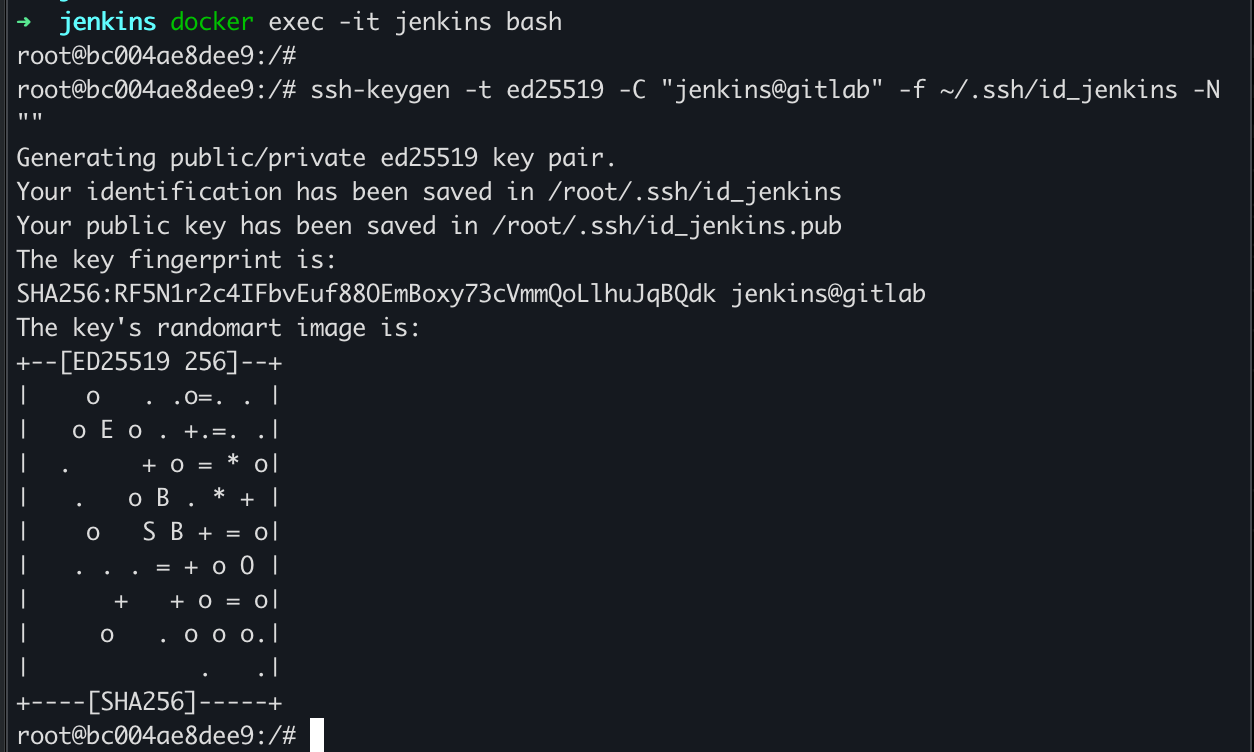
Jenkins 내 root 계정 ssh 키 생성
docker exec -it jenkins bash
ssh-keygen -t ed25519 -C "jenkins@gitlab" -f ~/.ssh/id_jenkins -N ""
in jenkins cert, we cant use passphase for ssh key. with passphase , there were error for connecting.
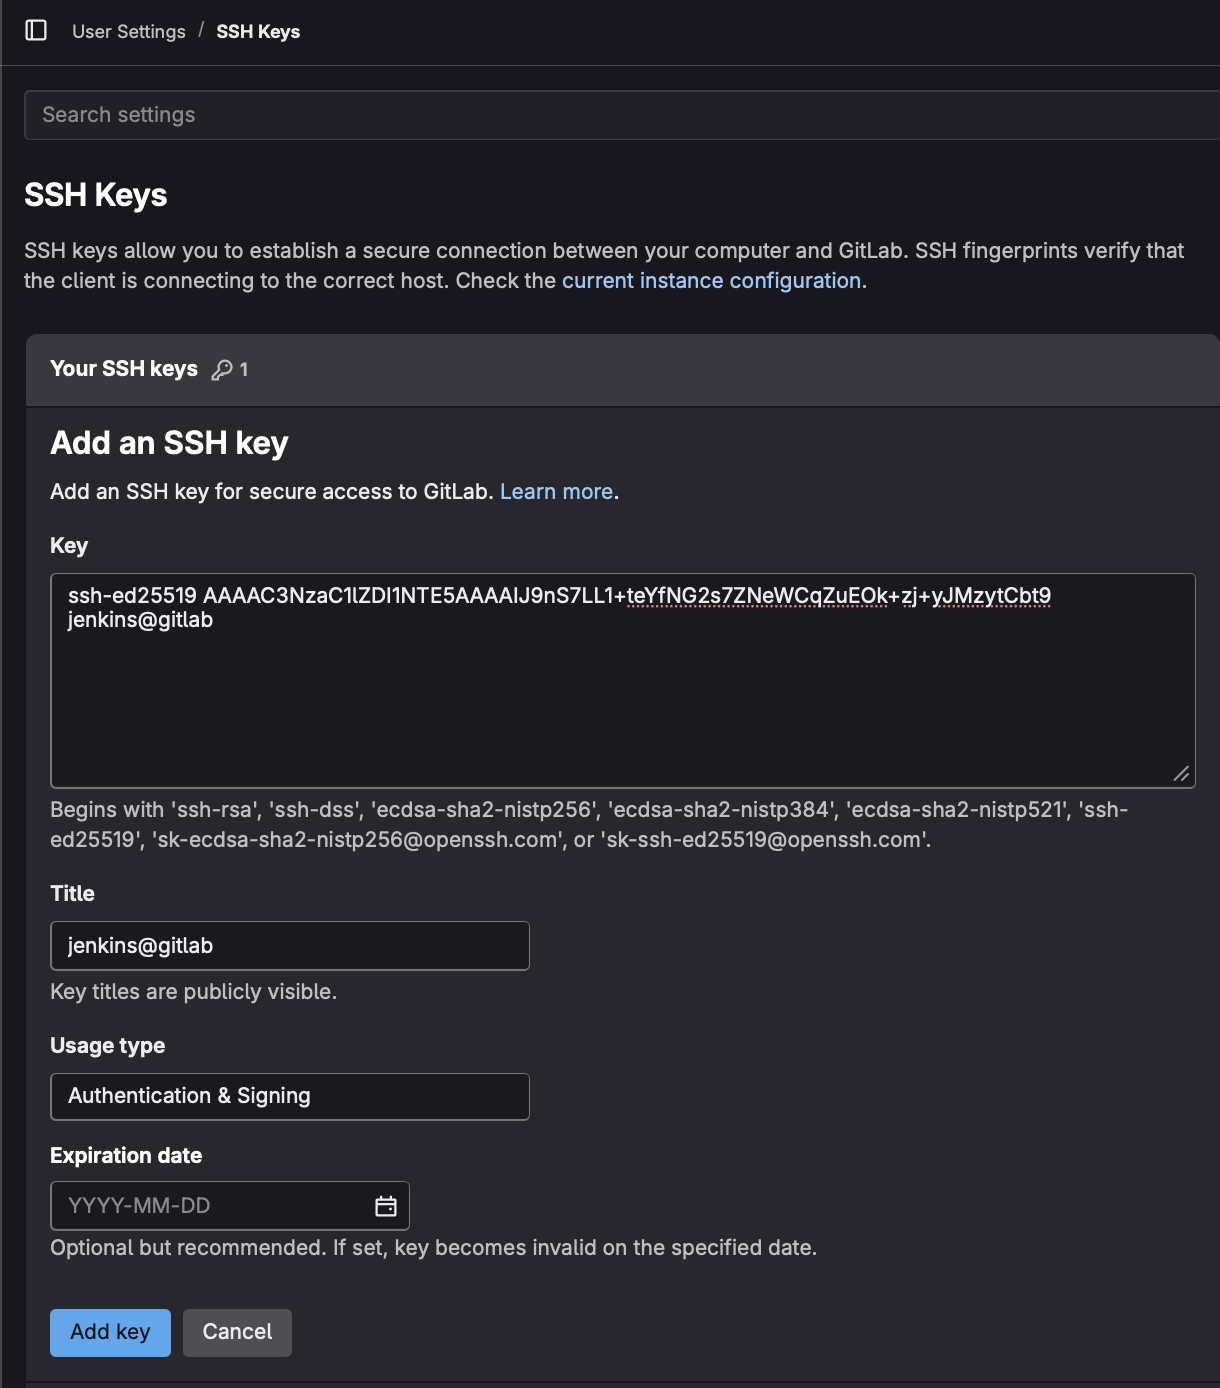
id_jenkins.pub Gitlab계정의 ssh 키에 등록
cat ~/.ssh/id_jenkins.pub

ssh 접근 테스트 - 여기서 접근 가능해야, jenkins 웹에서도 접근 가능.
ssh -T git@host.docker.internal -p 2224 -i ~/.ssh/id_jenkins

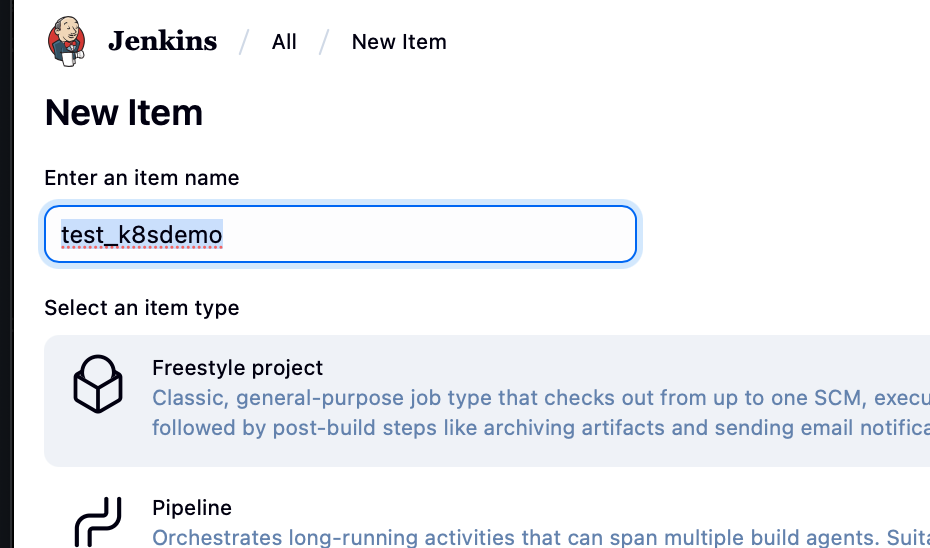
test project 생성
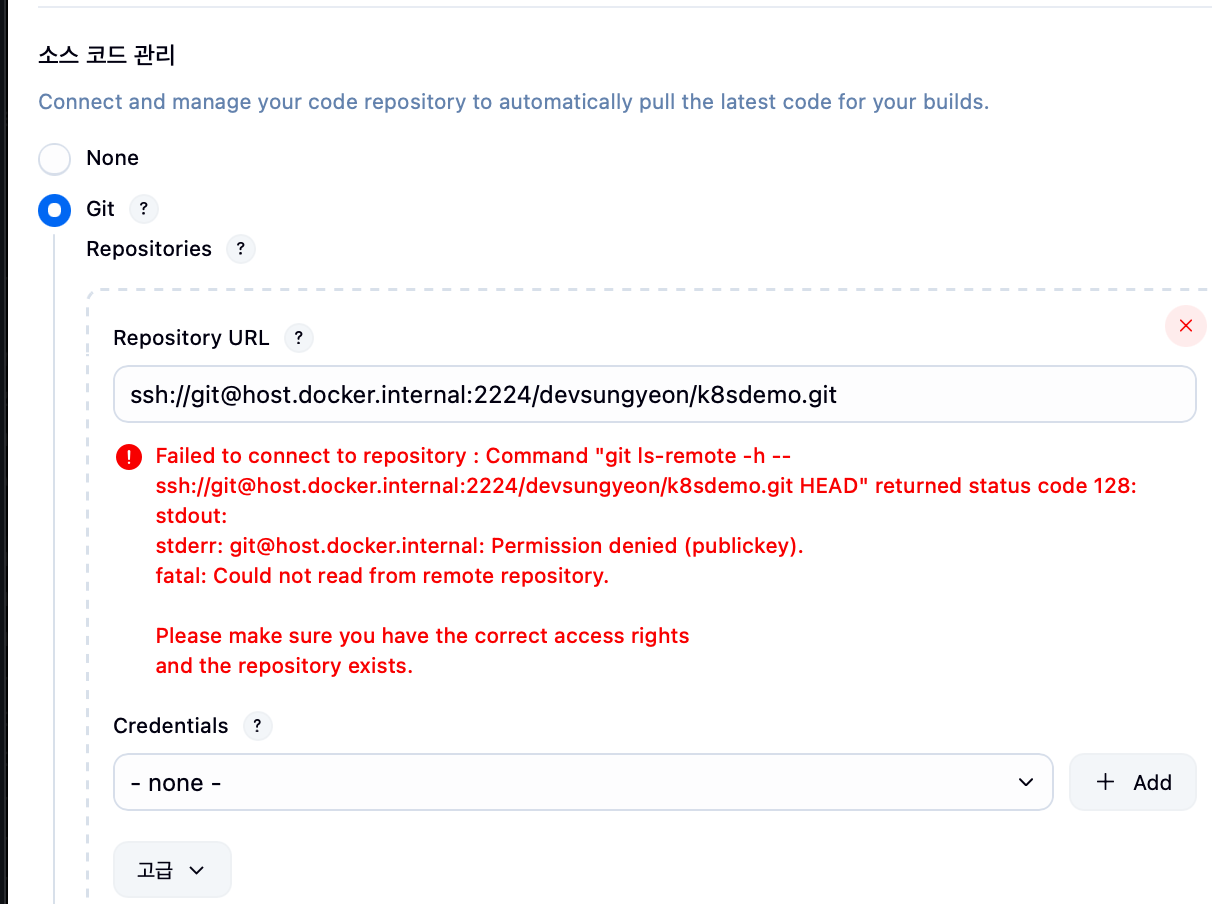
Credentials 생성
cat ~/.ssh/id_jenkins

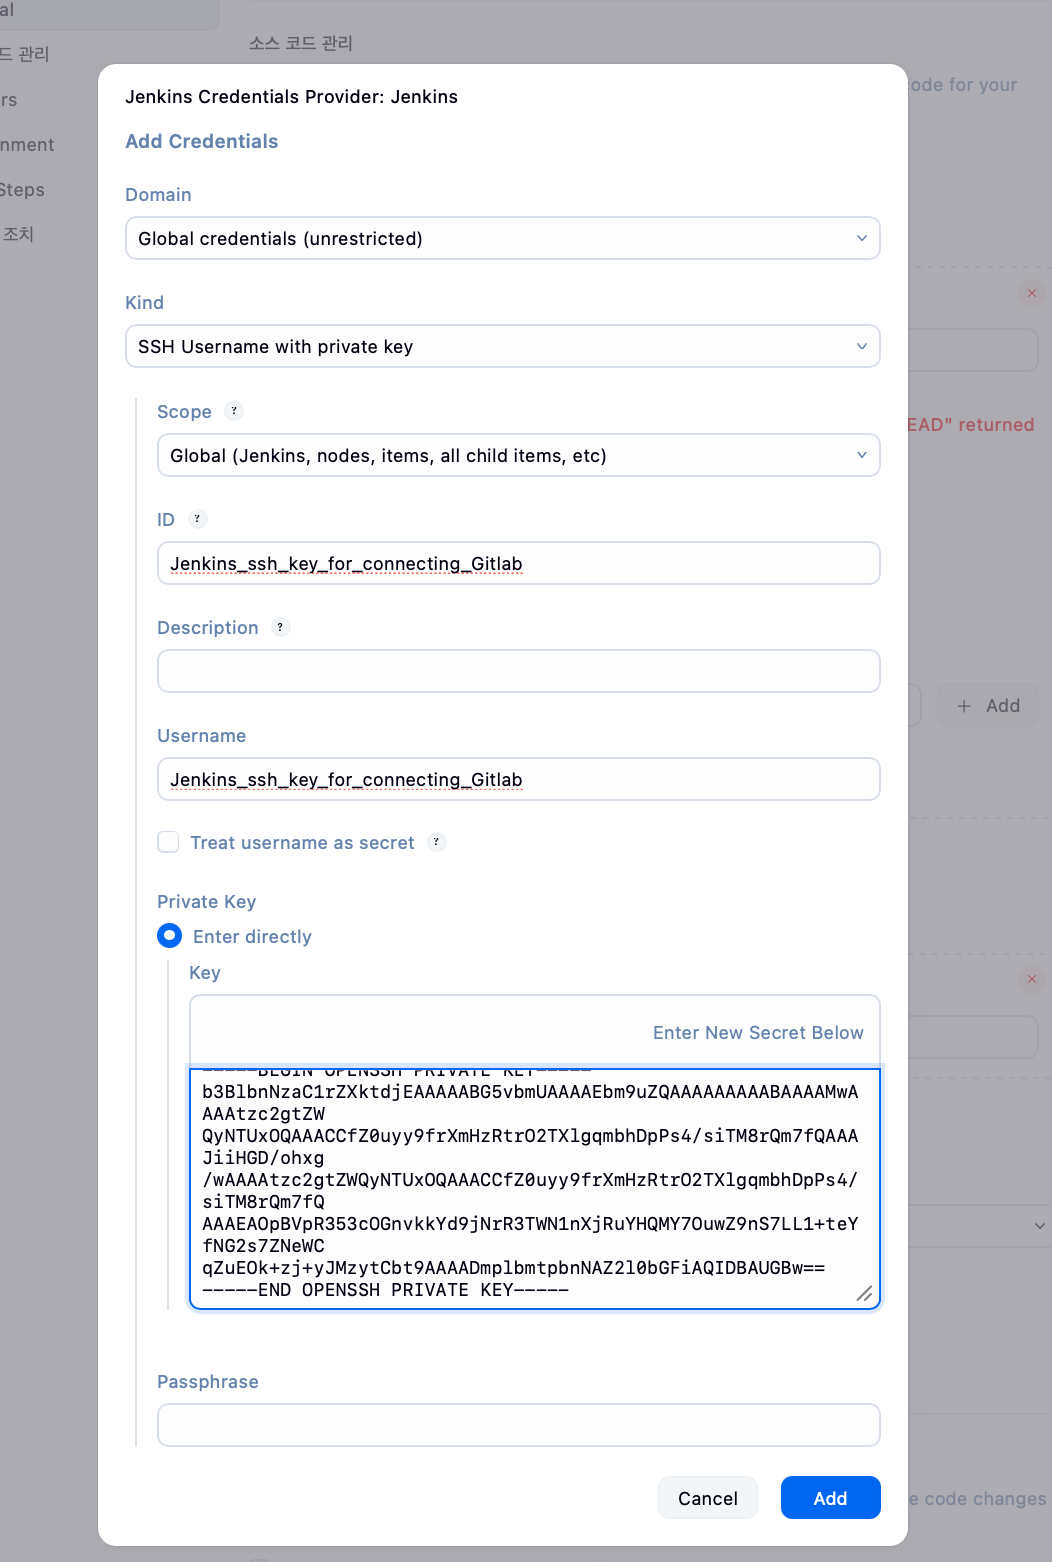
Credentials 선택후, 에러 사라짐
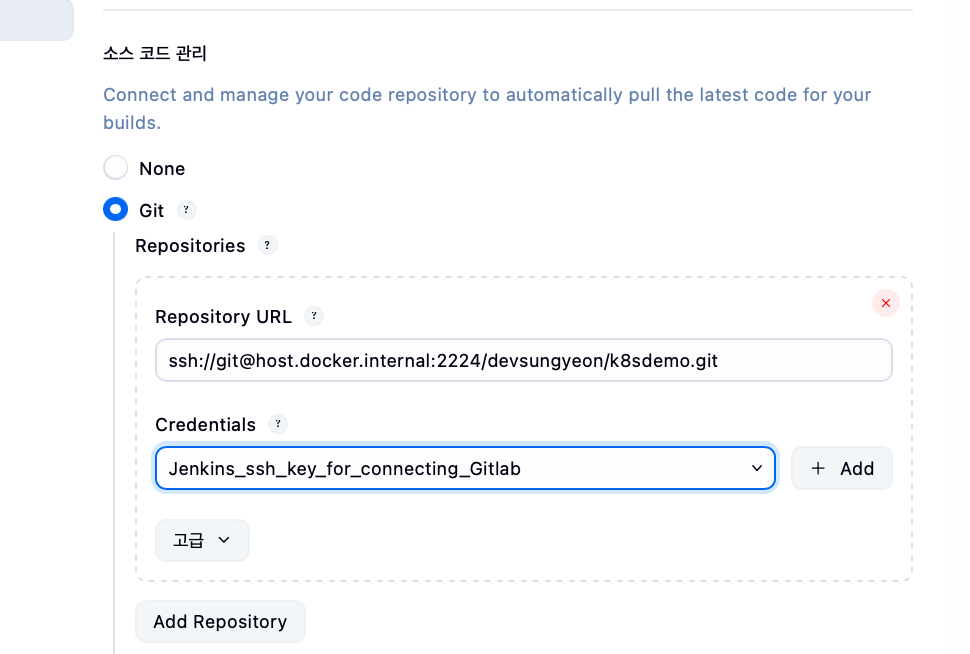
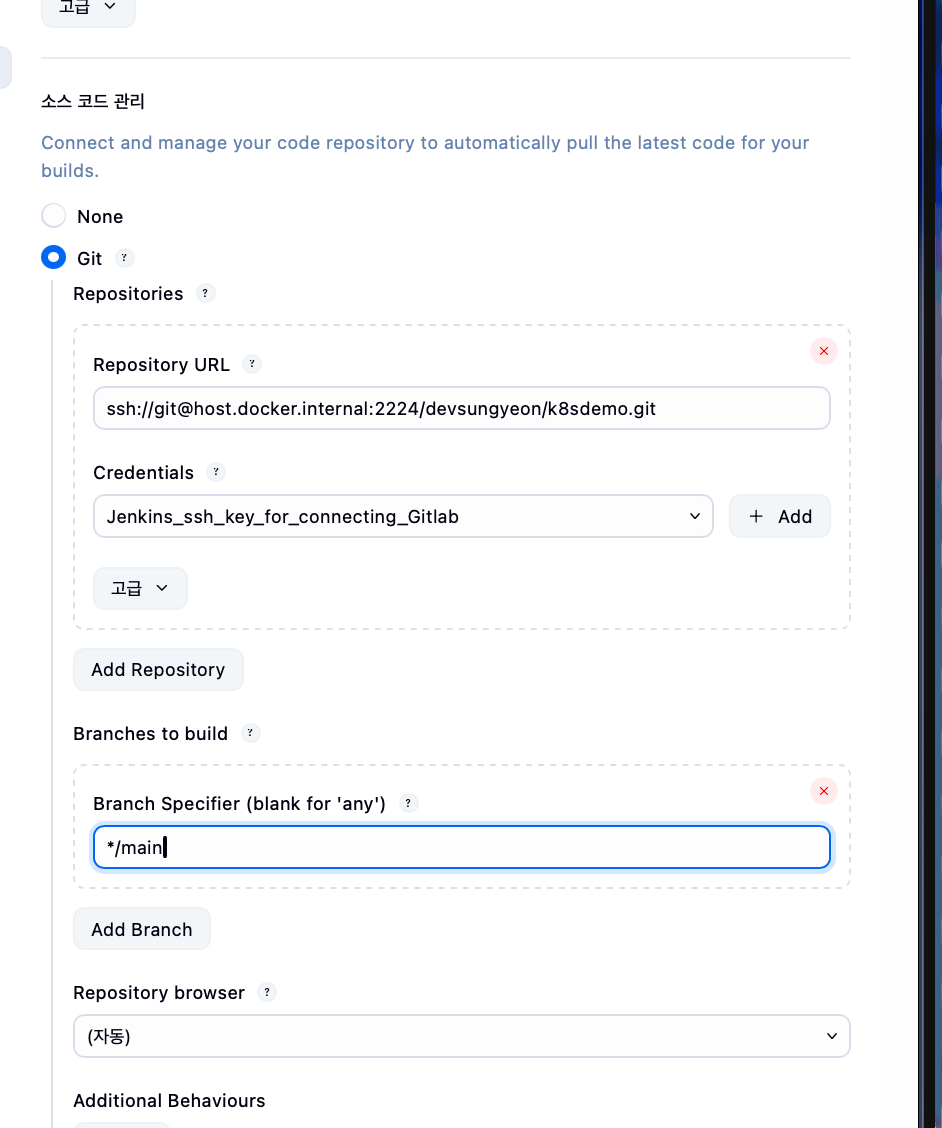
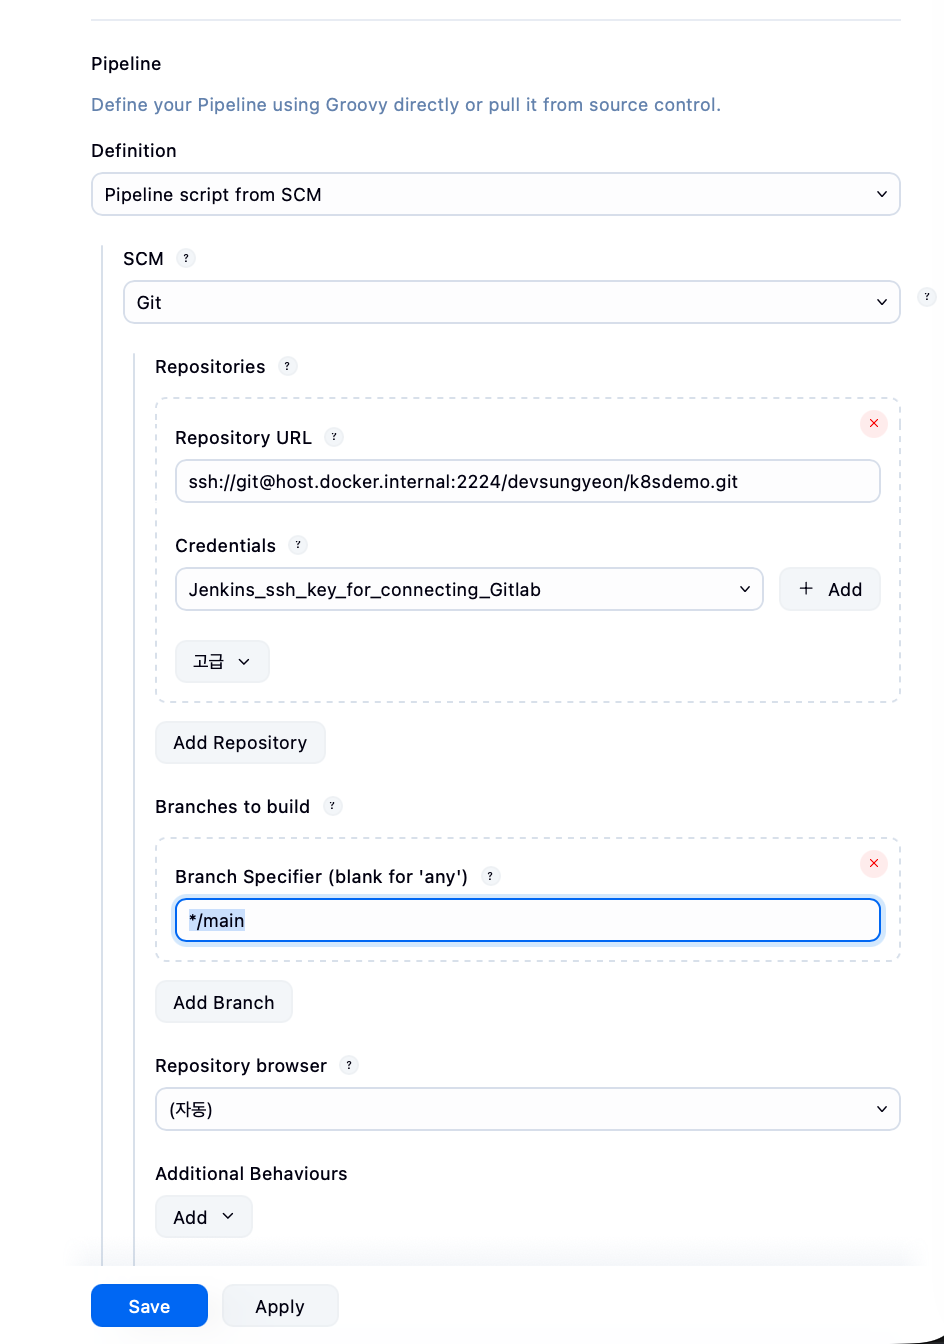
브랜치명 수정
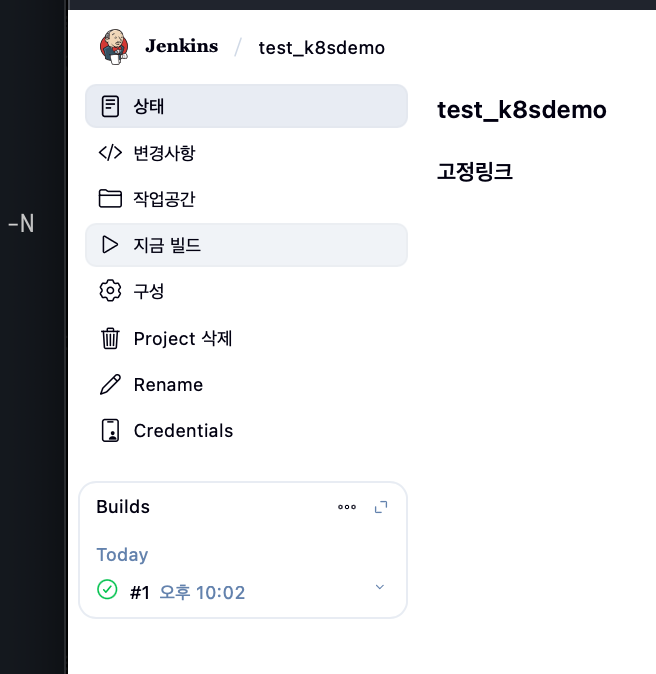
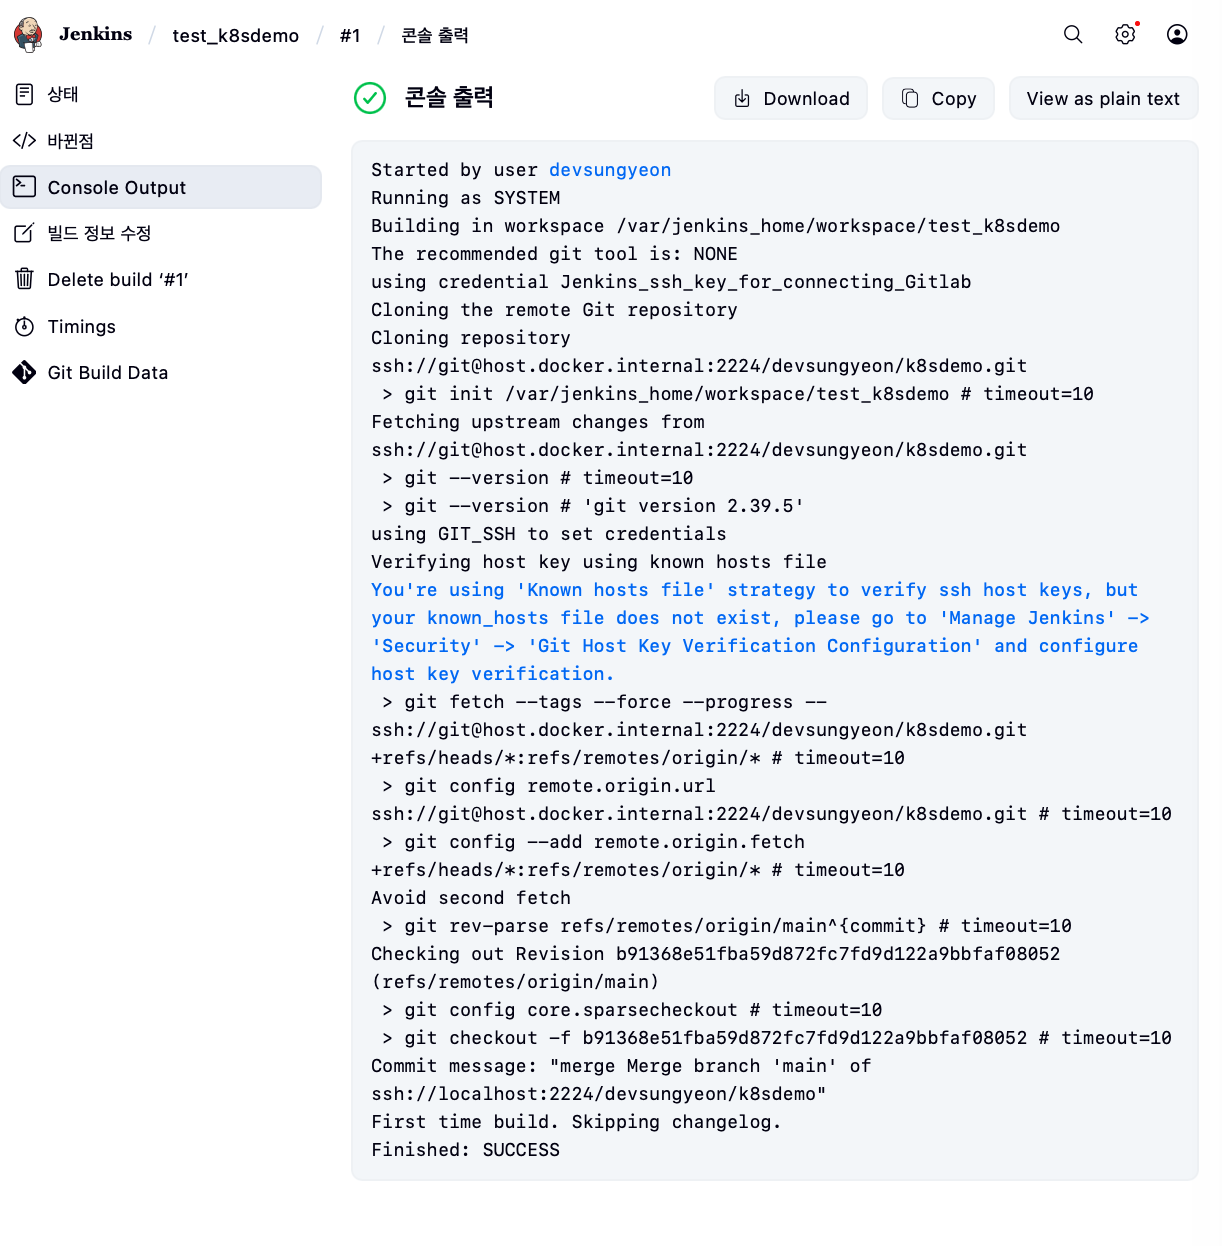
빌드 테스트
Gitlab webhook 연결 with jenkins
Plugin Gitlab 설치 in Jenkins
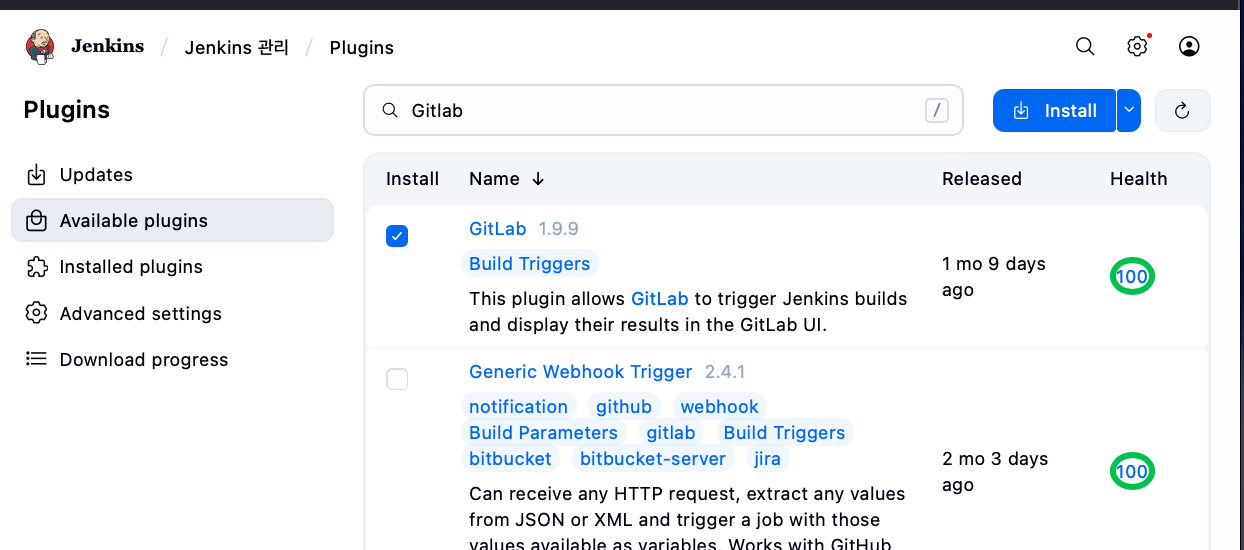
GitLab 계정에서 Access tokens 생성
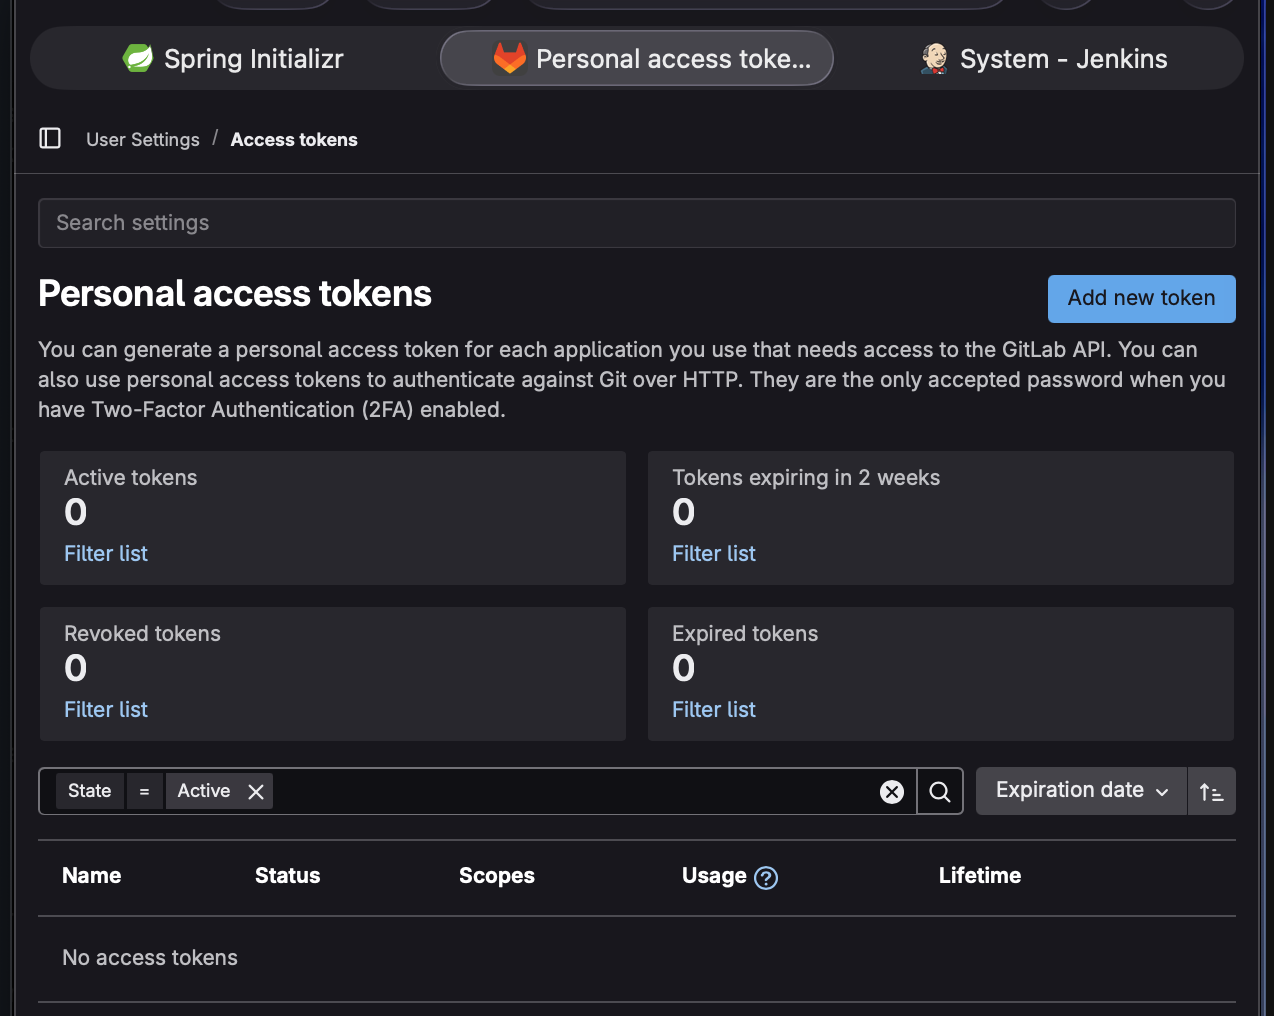
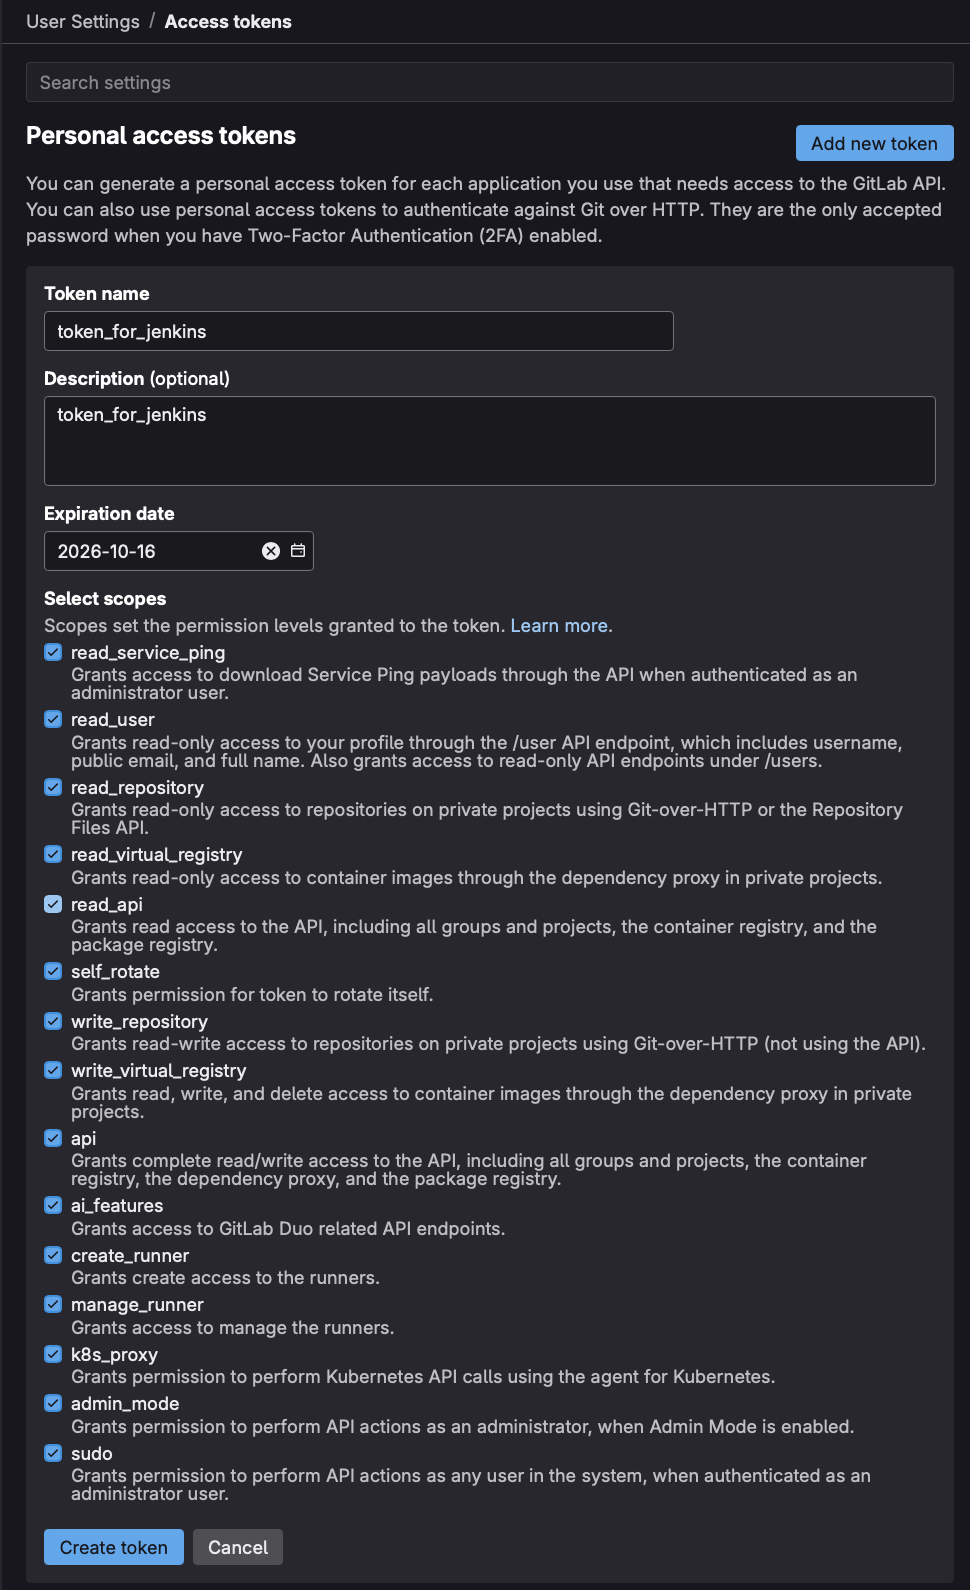
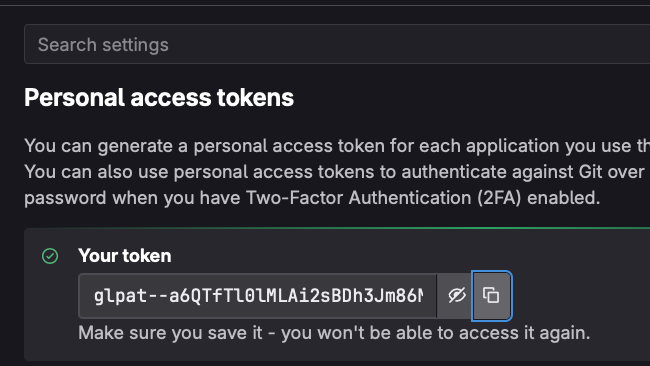
GitLab 연결 : Jenkins관리 - System - GitLab
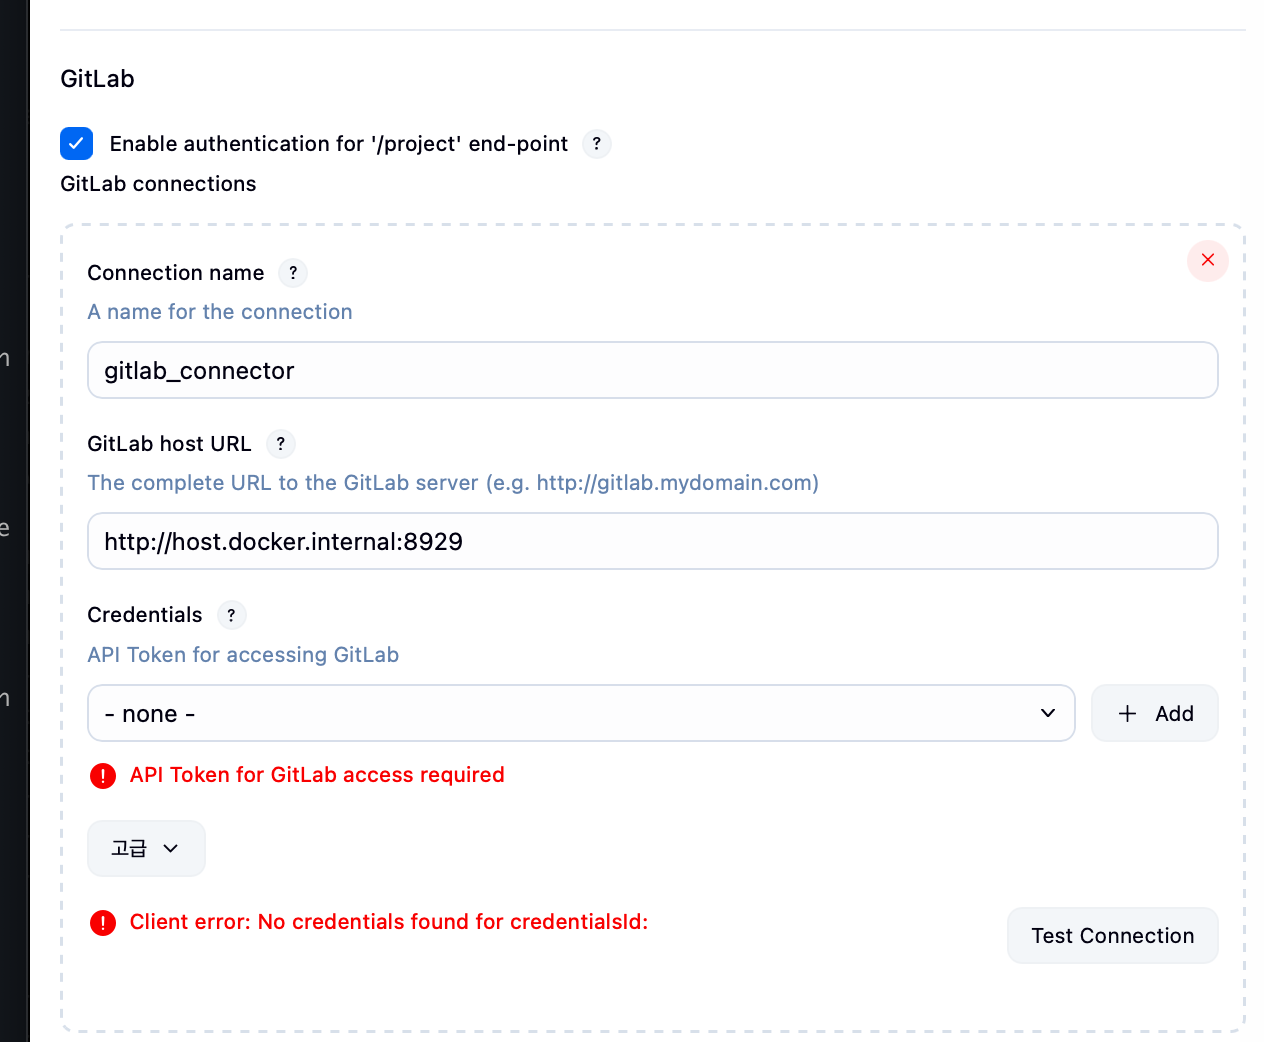
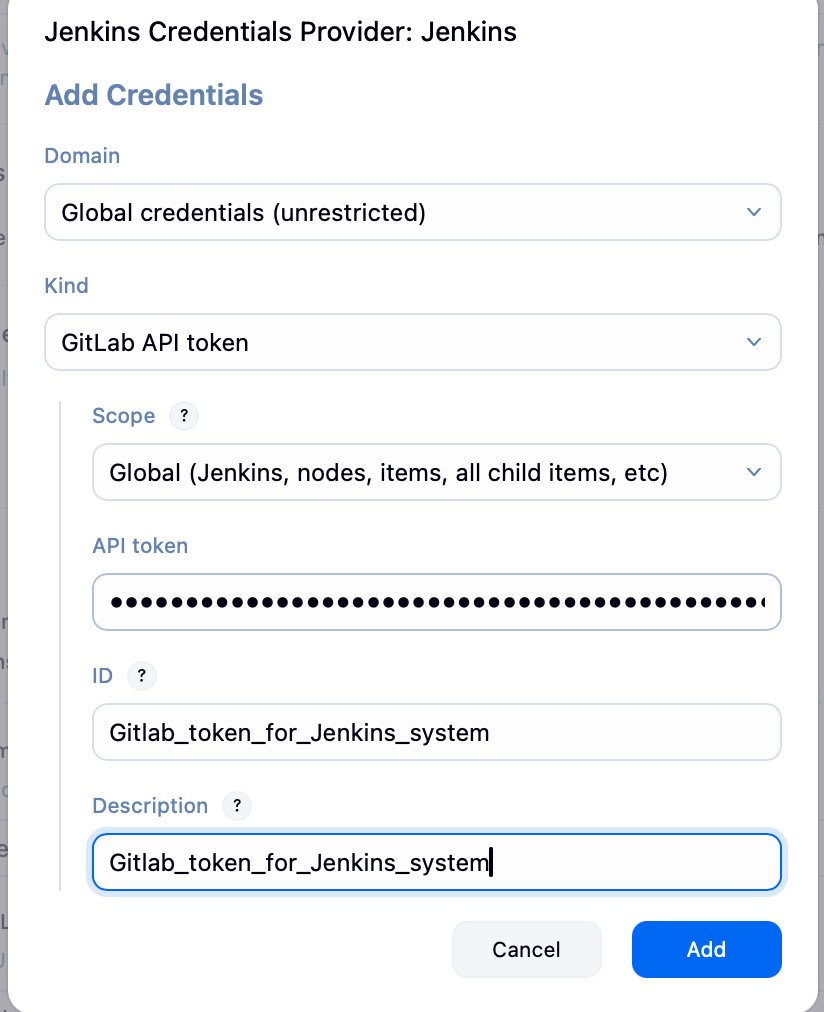
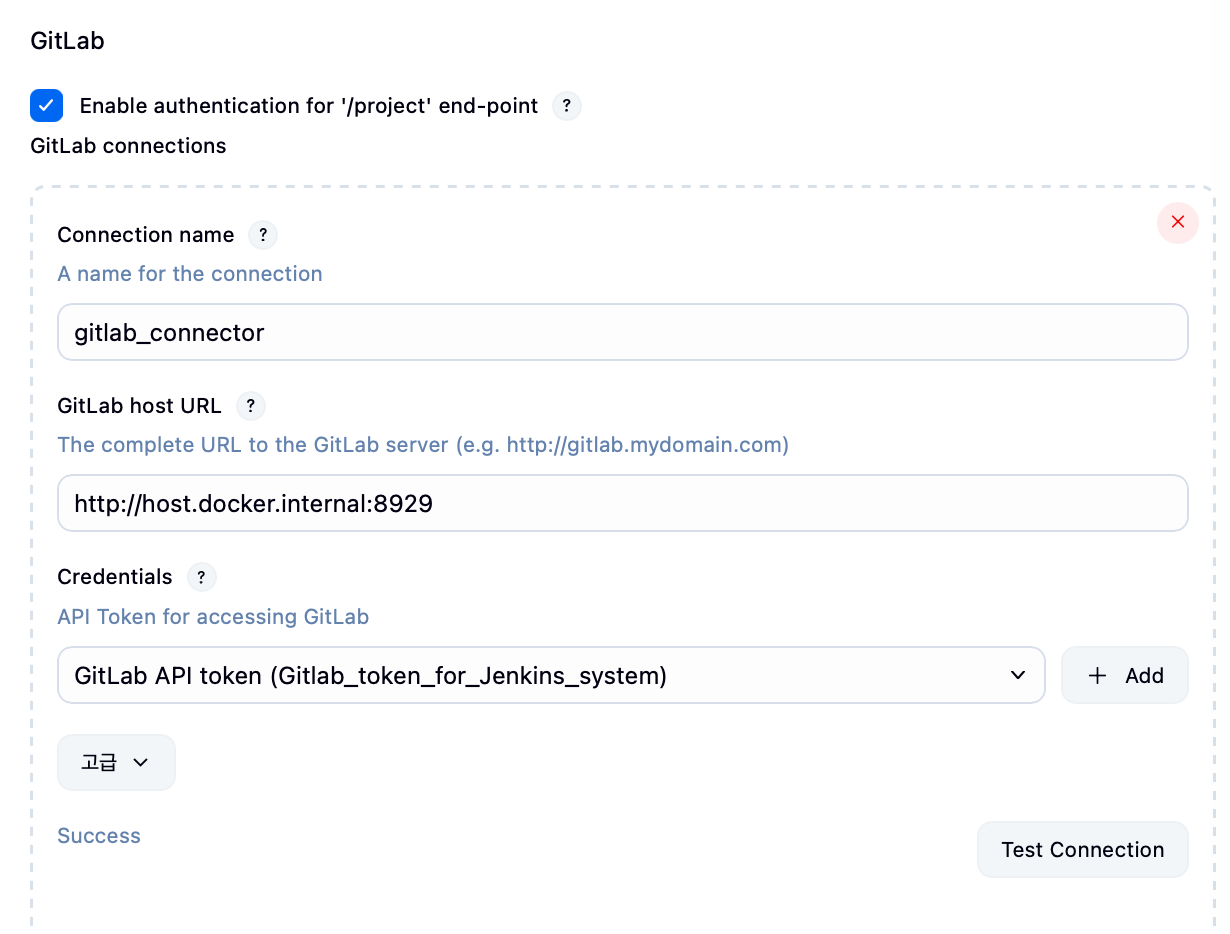
Jenkins Item 생성 (k8sdemo build) : Pipeline
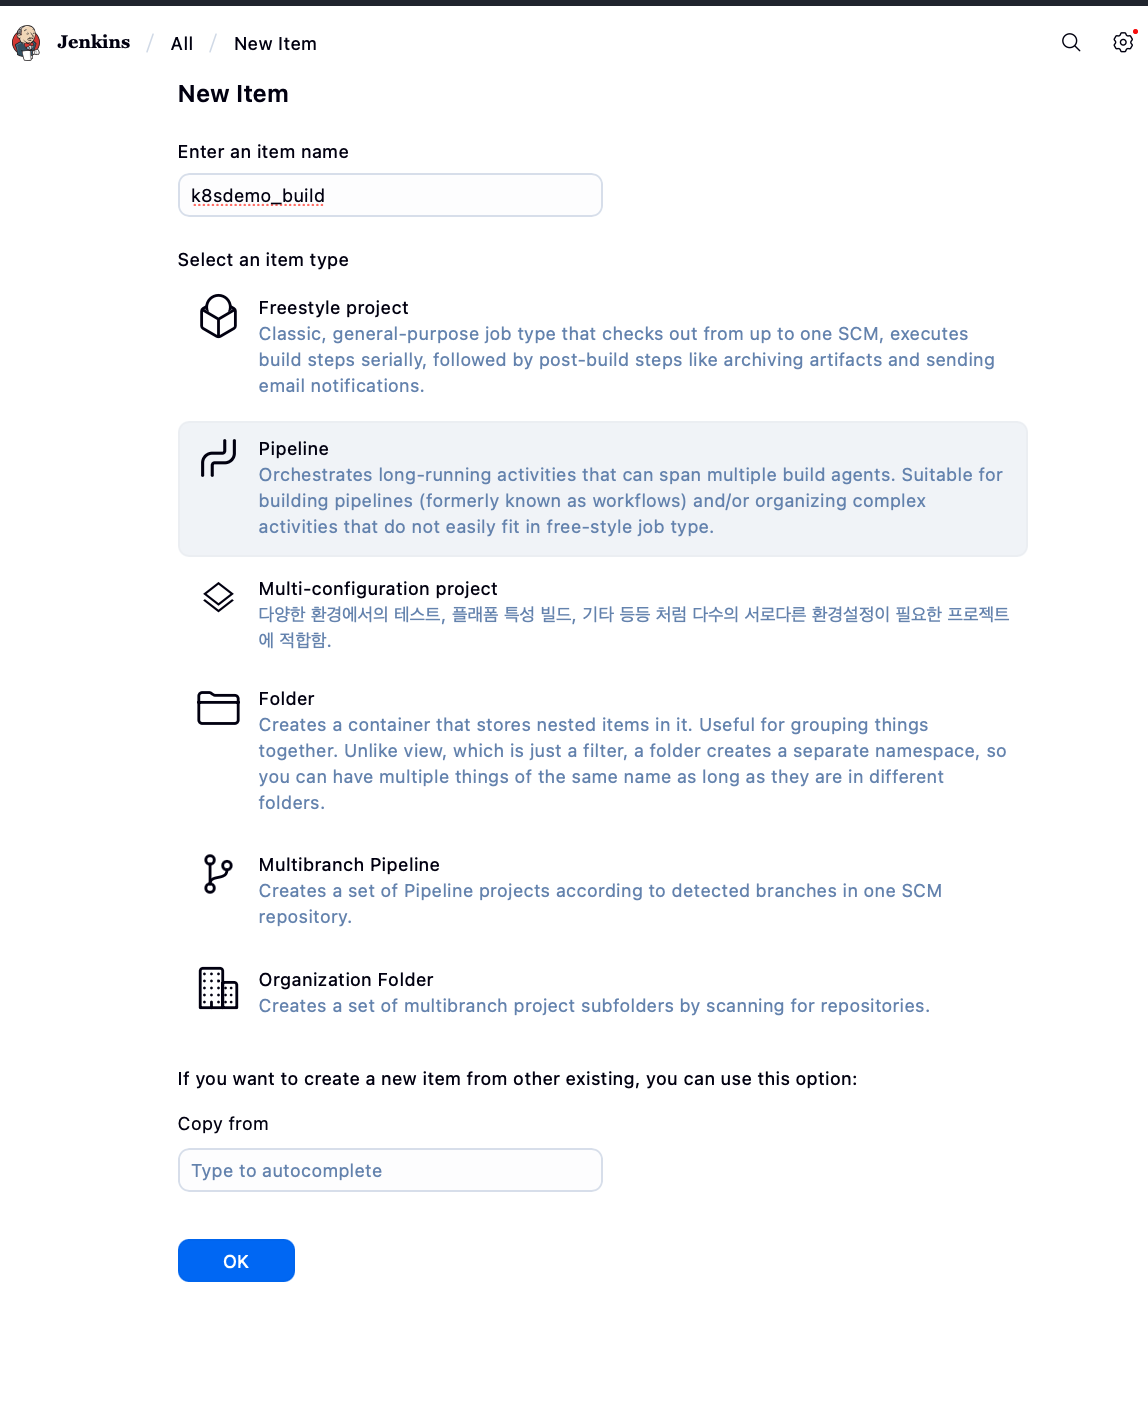
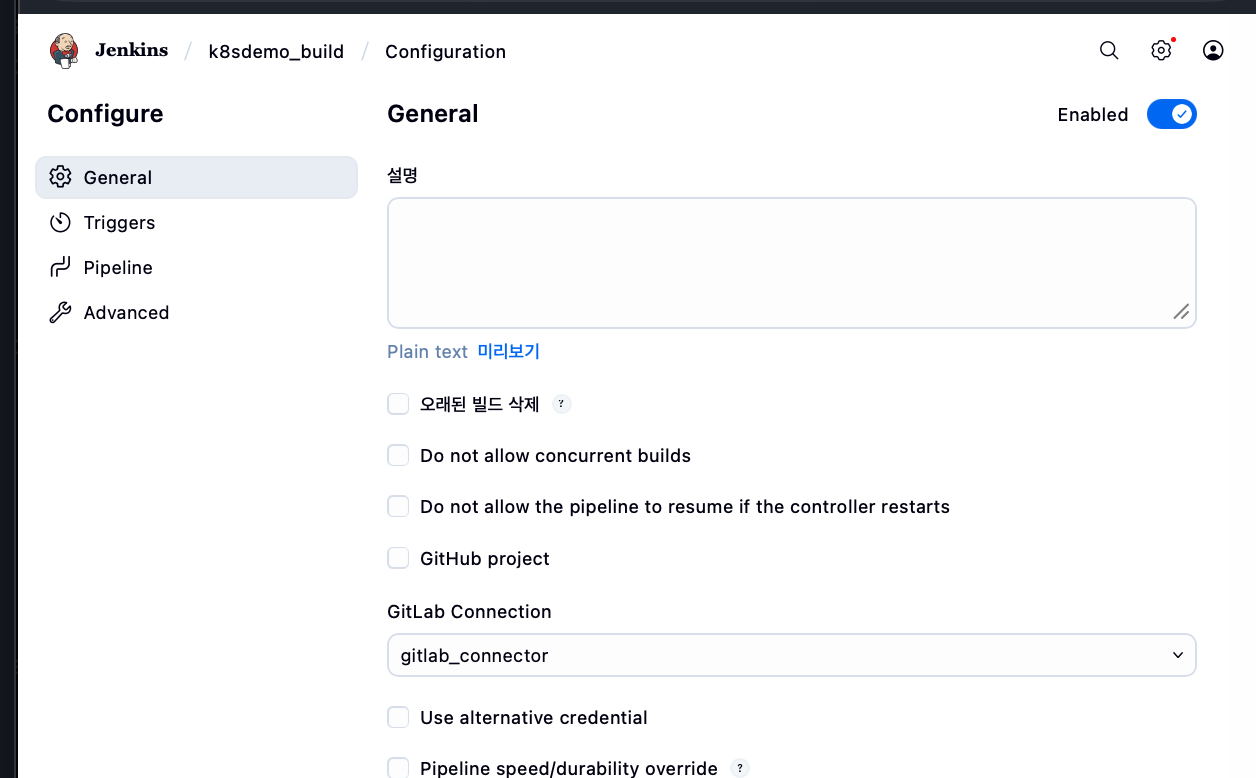
Jenkins - Trigger 체크
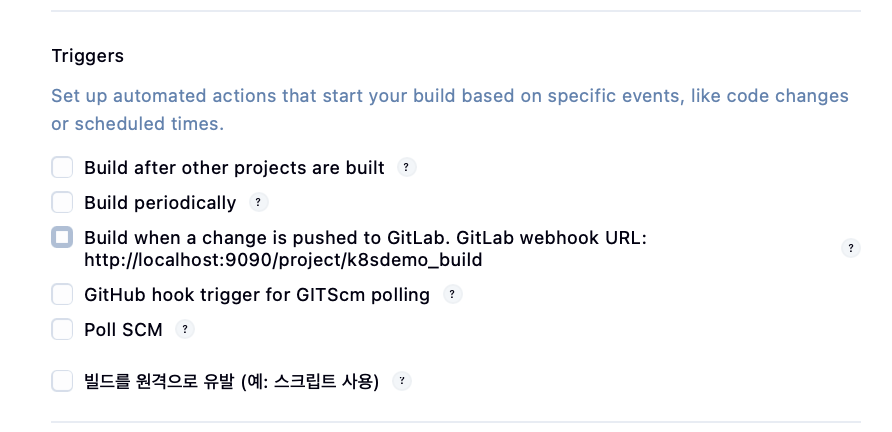
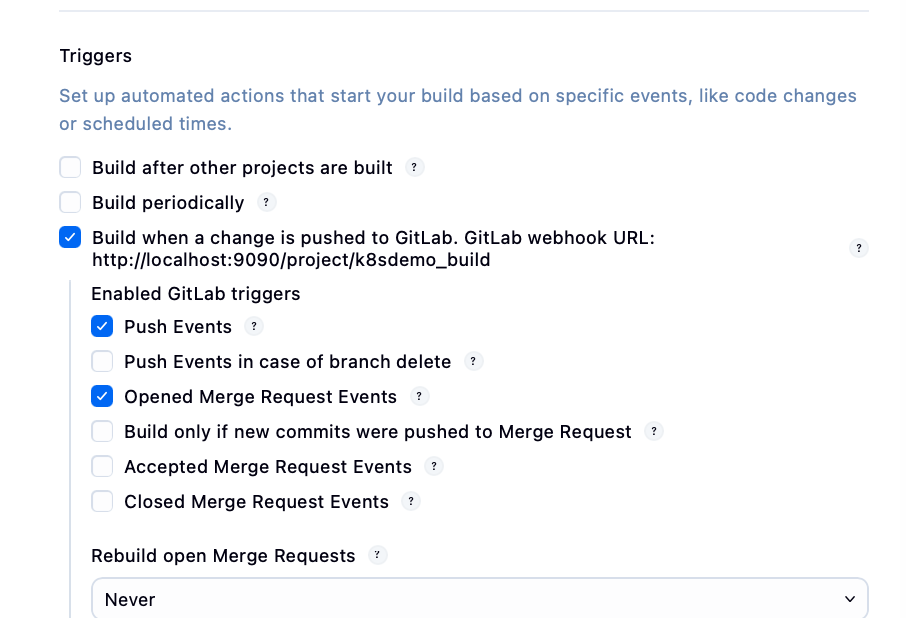
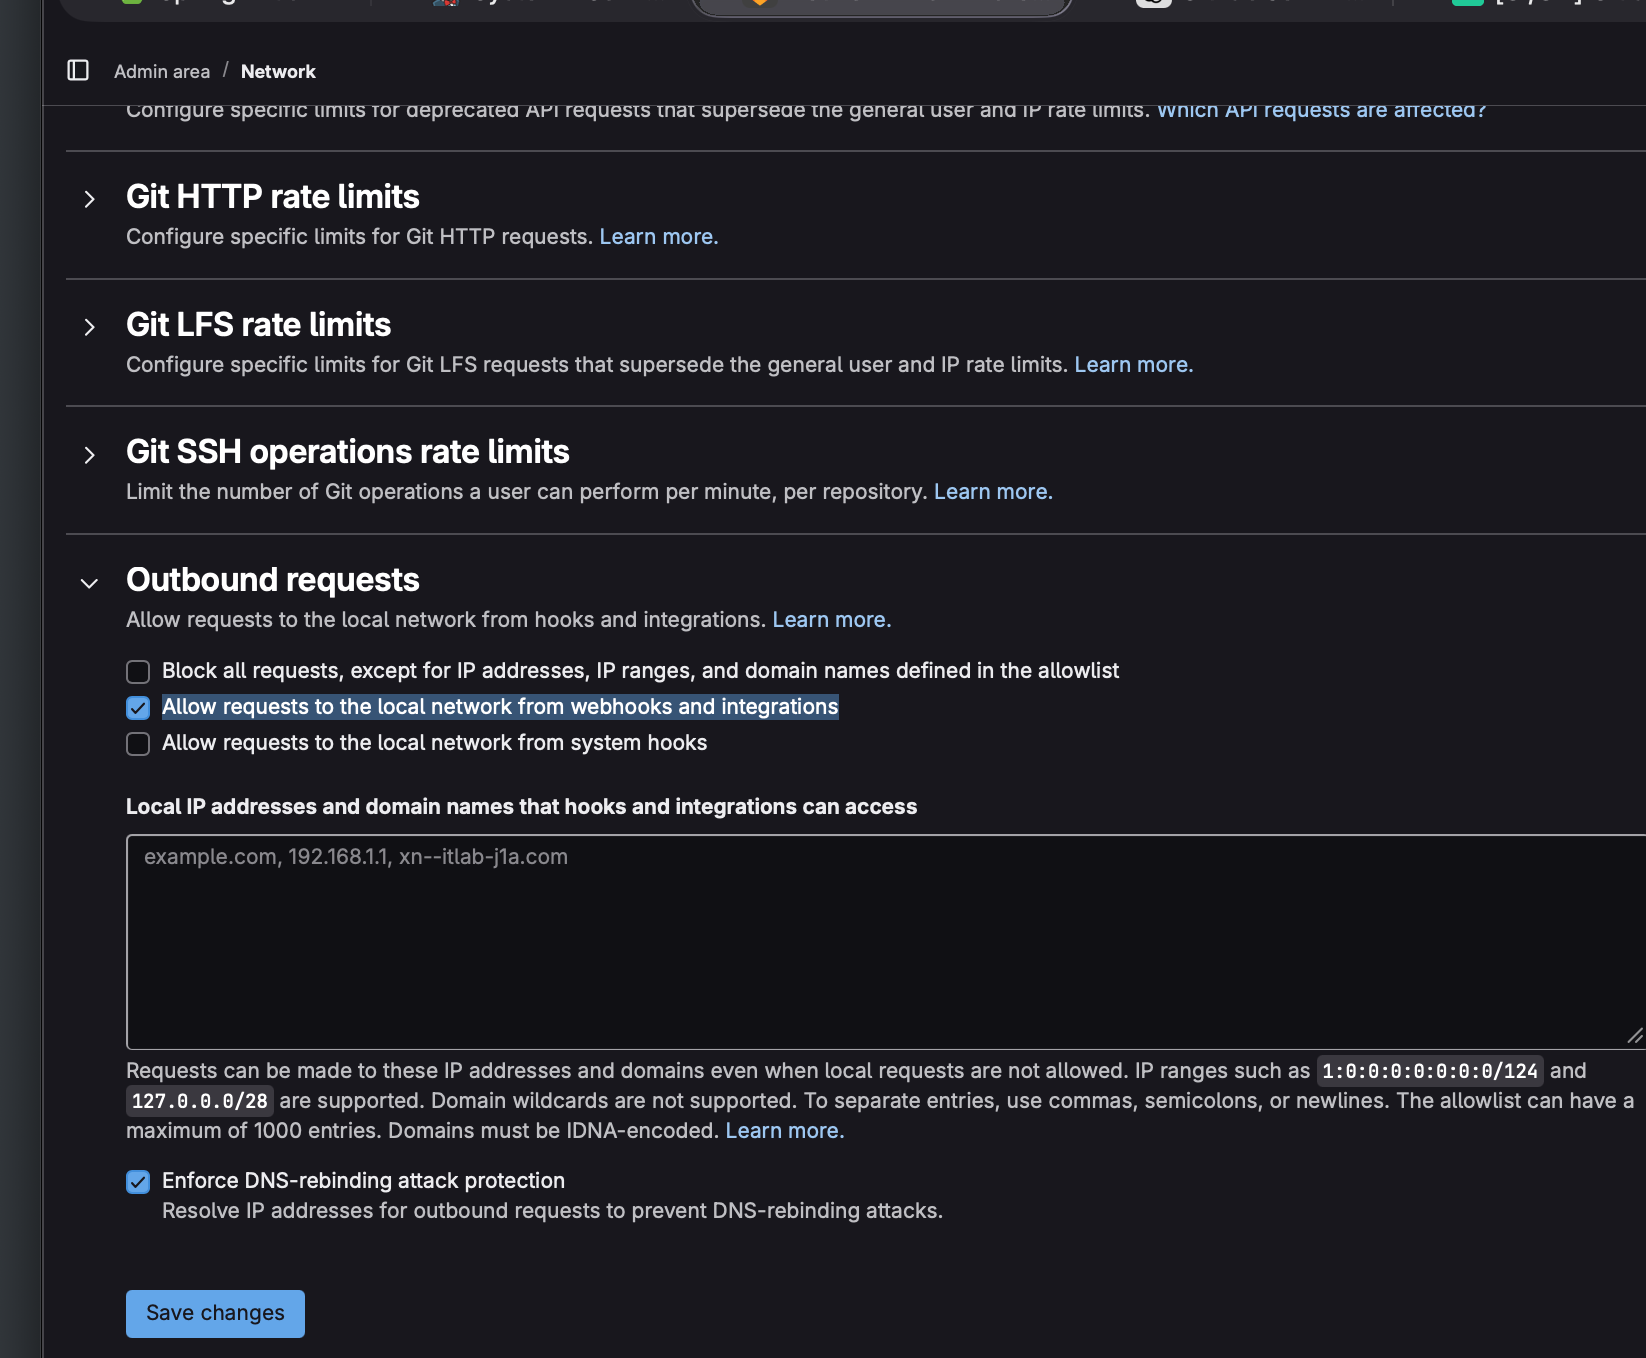
Gitlab - 하기 중간 체크 필요 Allow requests to the local network from webhooks and integrations
Jenkins에서 계정의 security 내 api token 발급
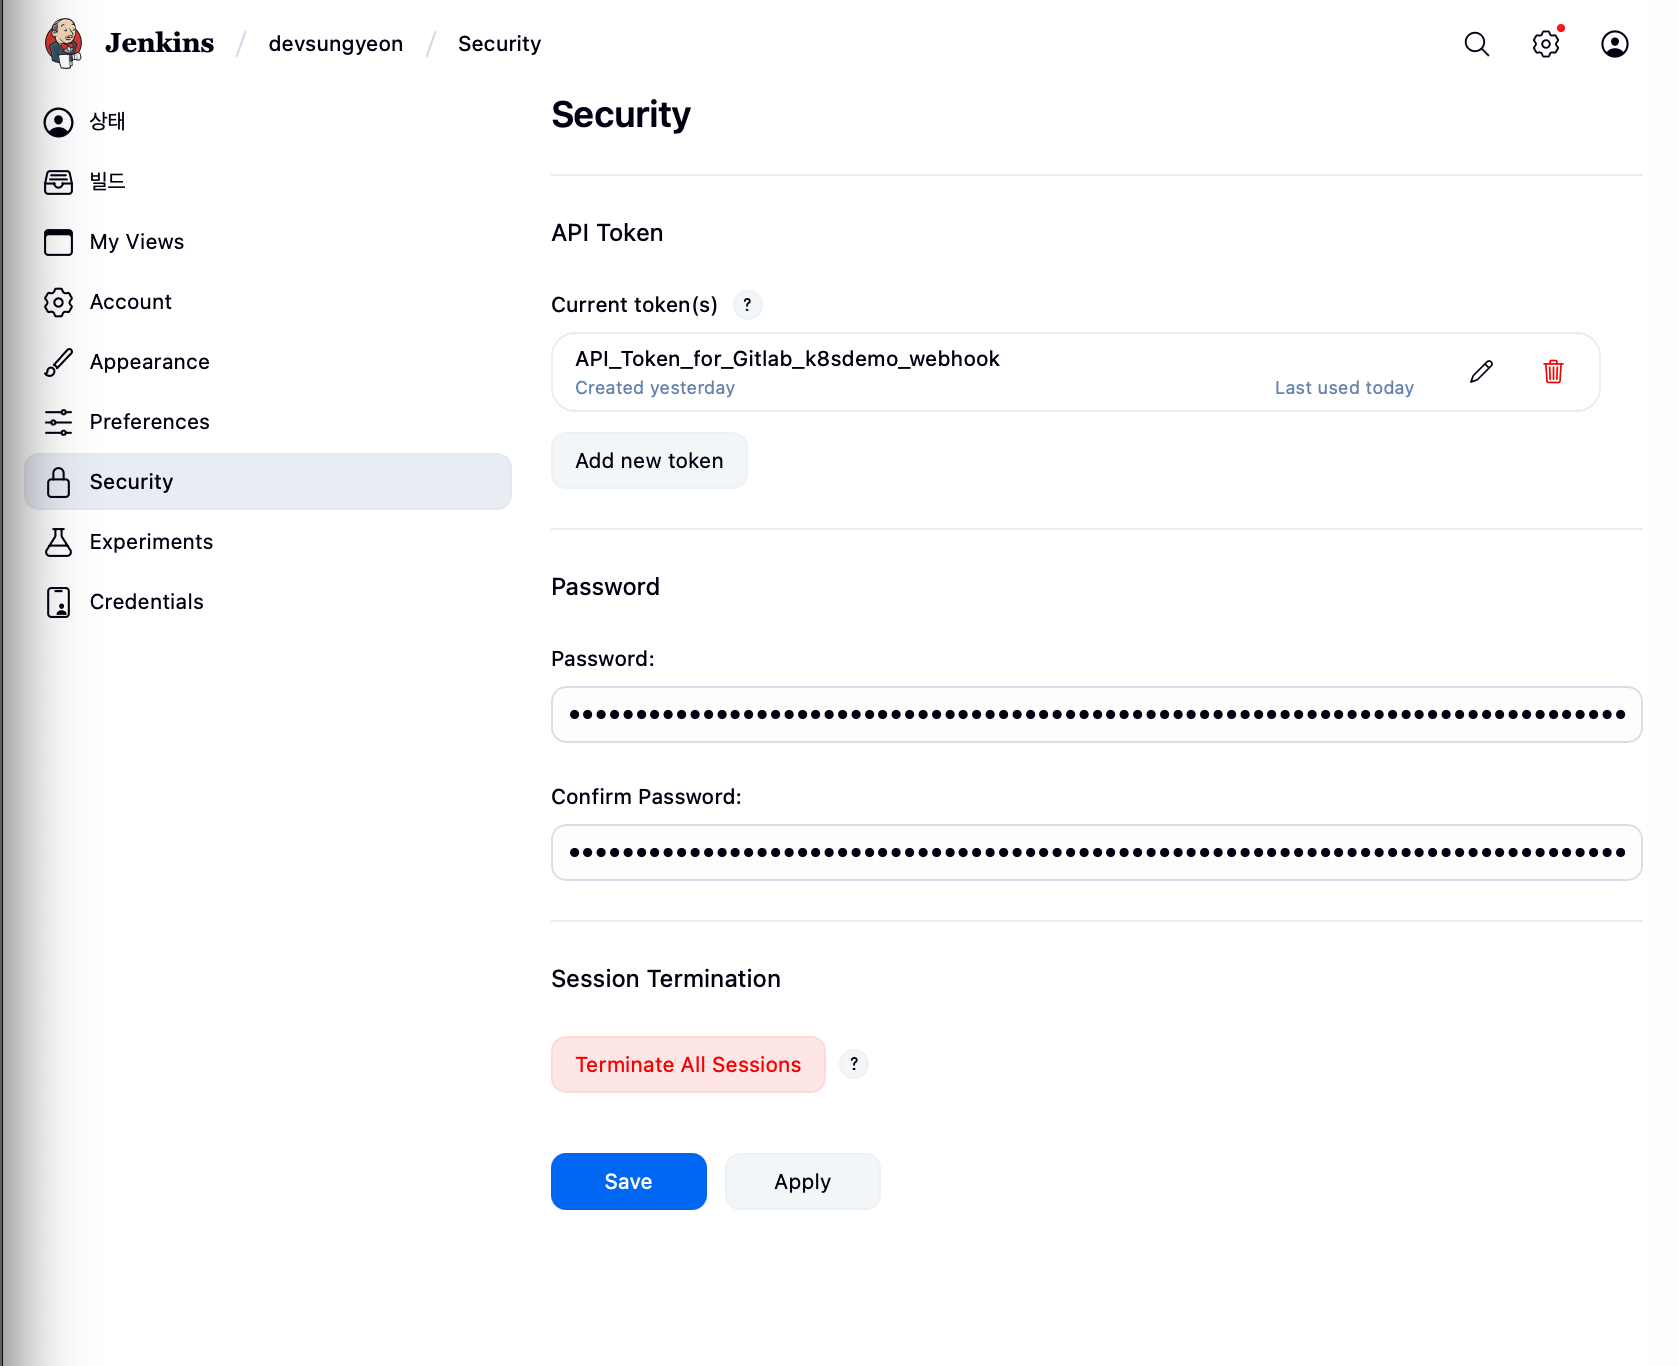
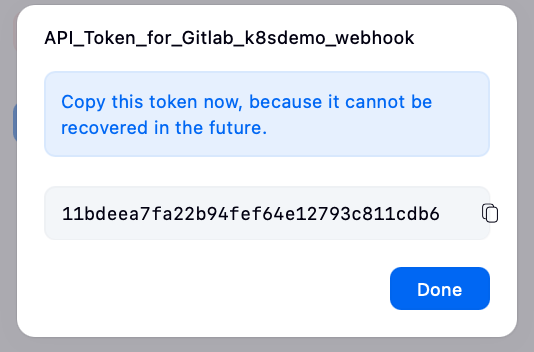
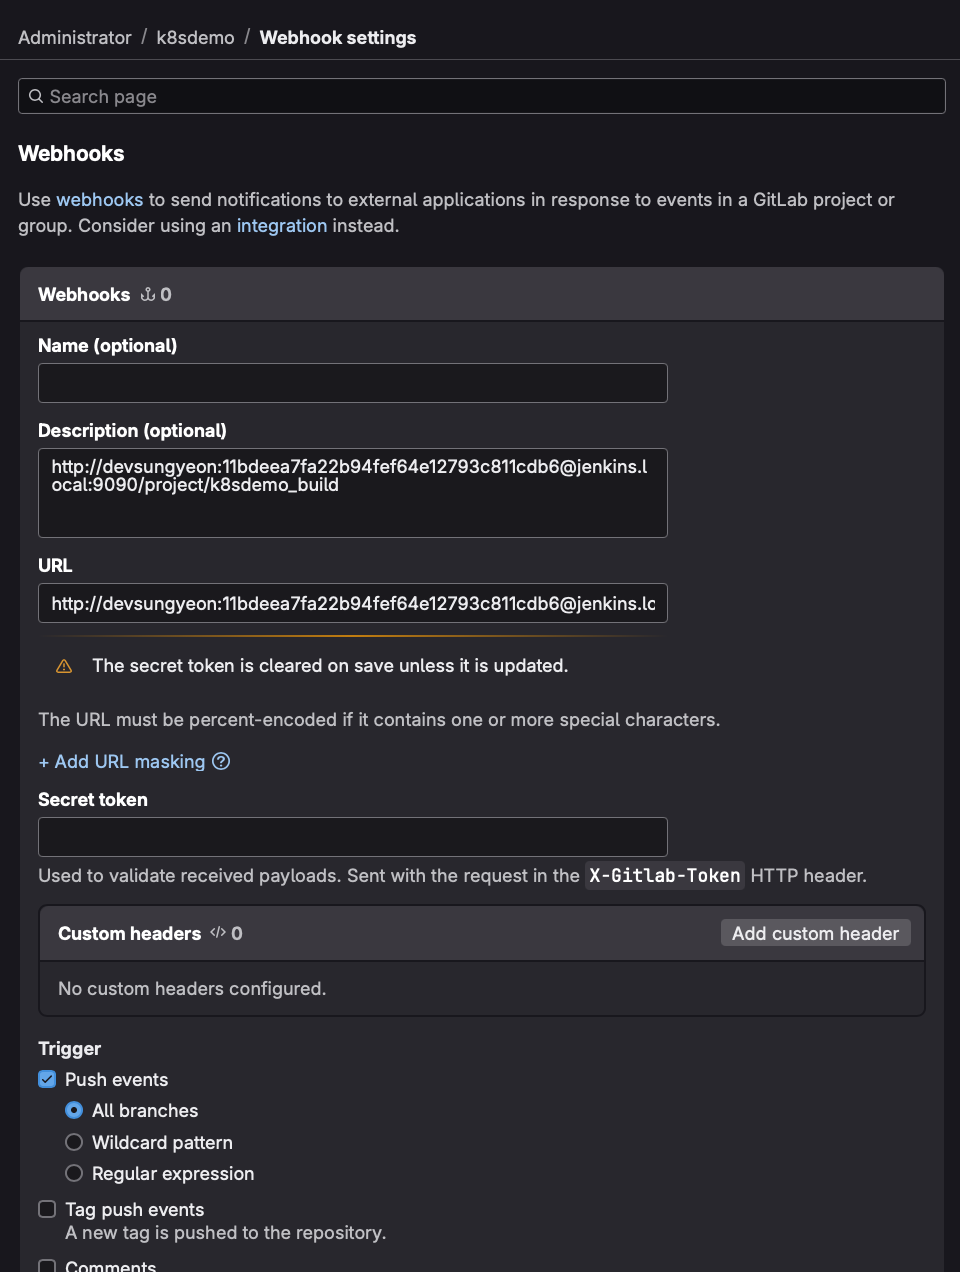
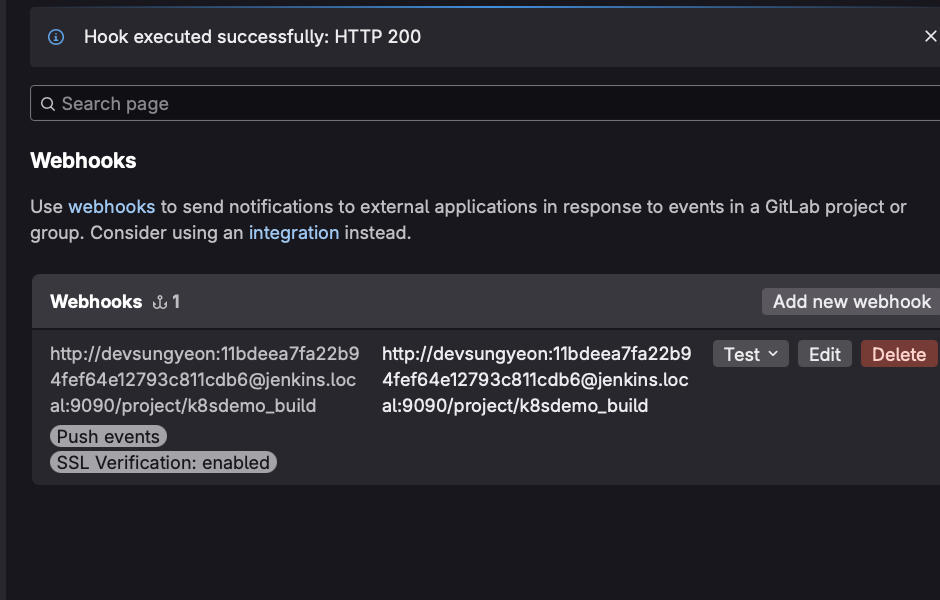
Gitlab - 웹훅 추가 시 , http://{user}:{jenkins_api_token}@jenkins.local:9090/project/k8sdemo_build
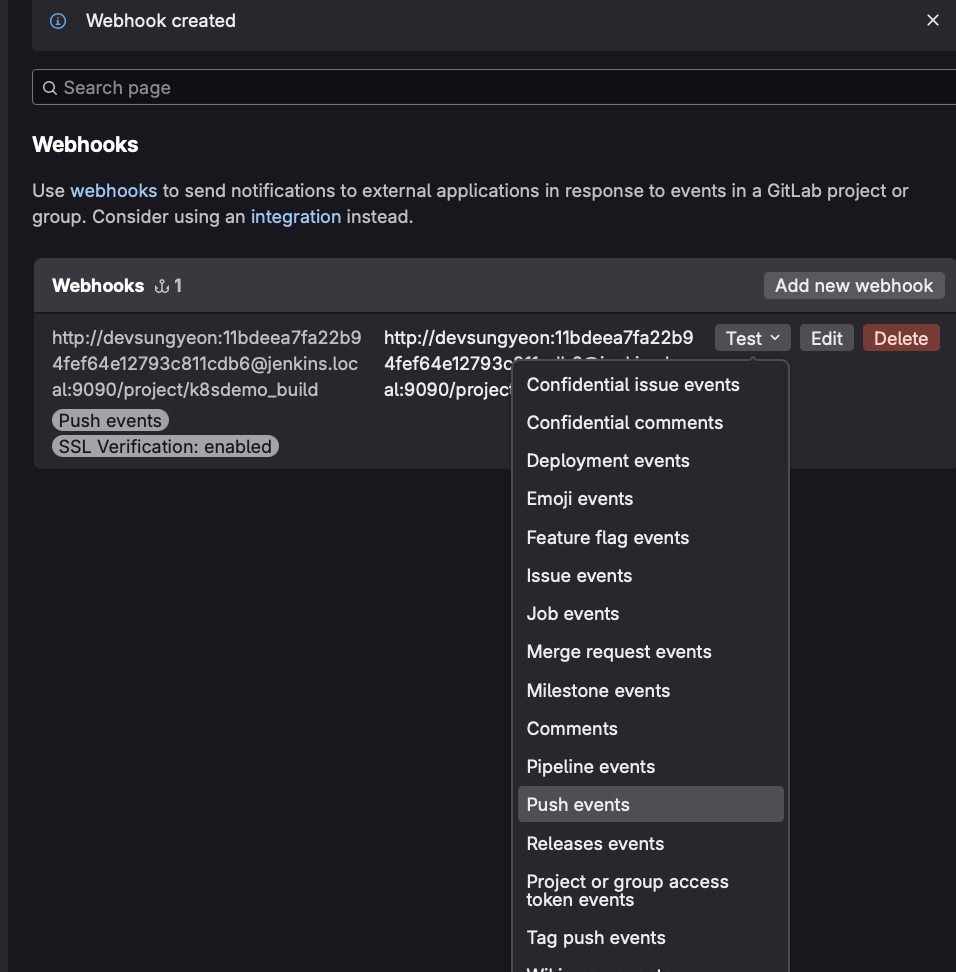
웹훅 테스트
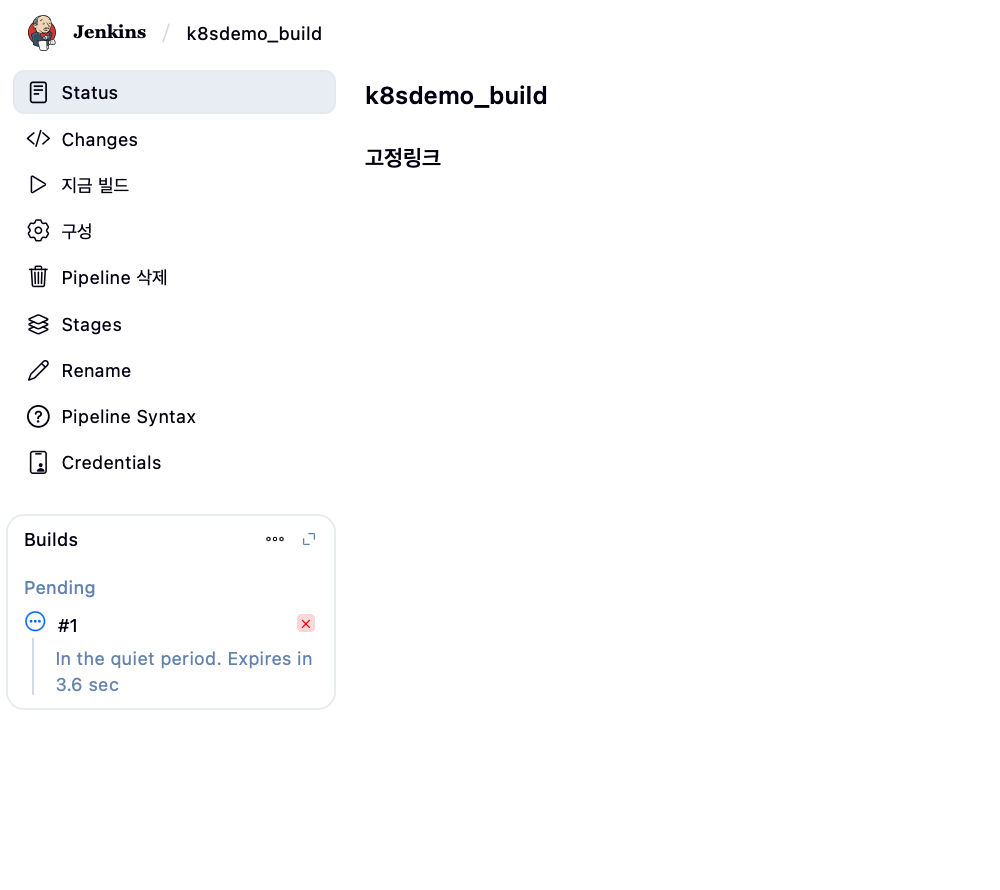
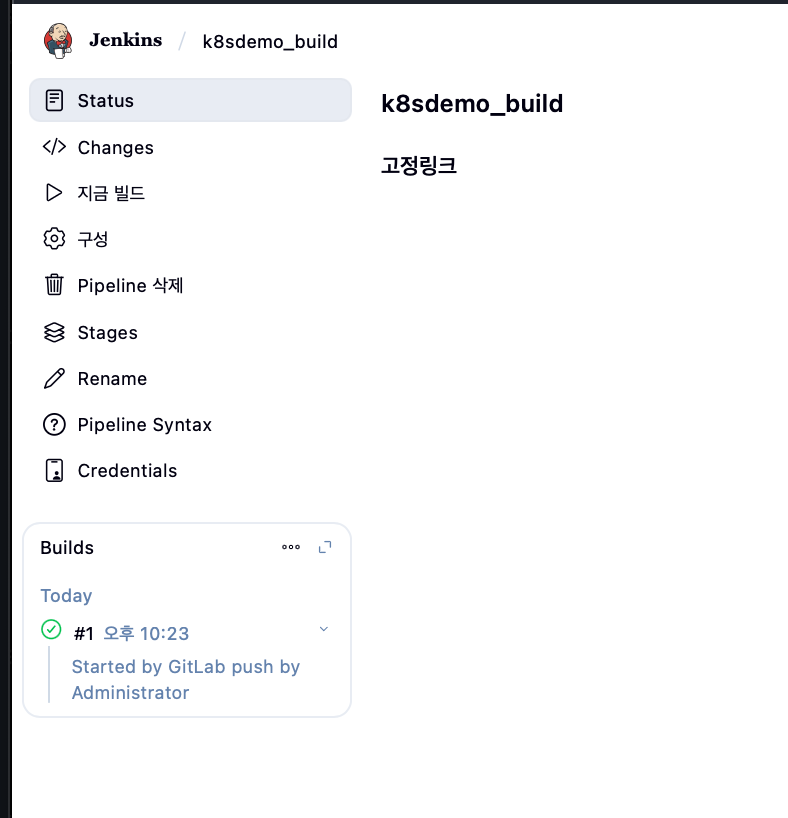
Jenkins 빌드 확인
Jenkins pipe라인 Definition 수정
Spring에서 .gitlab-ci.yml, Dockerfile 및 Jenkinsfile 추가
.gitlab-ci.yml 추가 - gitlab은 repo만 수행하므로 아무작업 없음. runner 미추가
echo "# GitLab CI disabled — Jenkins handles CI/CD.
stages:
  - noop

disable_job:
  stage: noop
  script:
    - echo \"GitLab CI is disabled. Jenkins handles all builds.\"
  rules:
    - when: never" > .gitlab-ci.yml

git add .gitlab-ci.yml
git commit -m "disable GitLab CI completely, use Jenkins only"
git push
Dockerfile
# Dockerfile
FROM openjdk:17-jdk-slim

WORKDIR /app

# Maven으로 빌드된 JAR 파일 복사
COPY target/*.jar app.jar

EXPOSE 8080

ENTRYPOINT ["java","-jar","/app/app.jar"]
Jenkinsfile
pipeline {
  agent any
  environment {
    IMAGE_NAME = 'k8sdemo'
  }
  stages {
    stage('Checkout') {
      steps {
        checkout scm
      }
    }
    stage('Maven Build') {
      steps {
        echo '🔧 Building Spring Boot application...'
        sh './mvnw -B clean package -DskipTests'
      }
    }
    stage('Docker Build') {
      steps {
        script {
          def GIT_COMMIT_HASH = sh(returnStdout: true, script: 'git rev-parse --short HEAD').trim()
          echo "🐳 Building Docker image: ${IMAGE_NAME}:${GIT_COMMIT_HASH}"
          sh "docker build -t ${IMAGE_NAME}:${GIT_COMMIT_HASH} ."
        }
      }
    }
  }
  post {
    success {
      echo '✅ Build successful!'
    }
    failure {
      echo '❌ Build failed.'
    }
  }
}
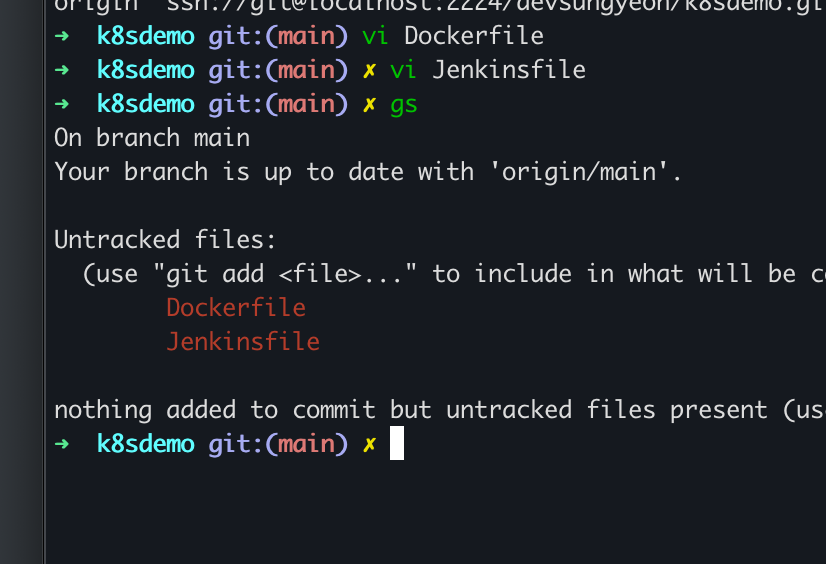
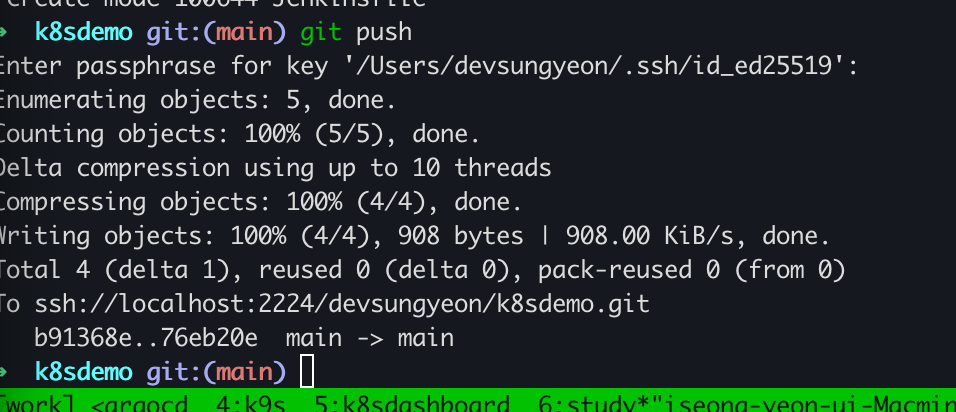
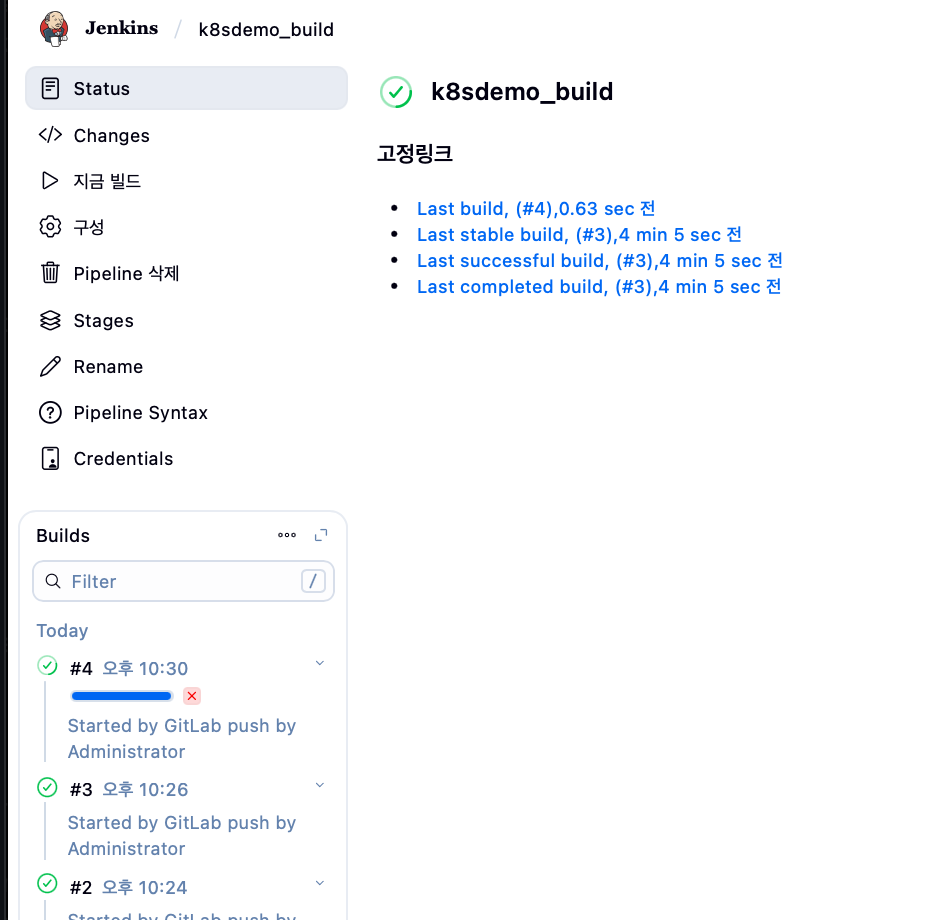
로컬에서 추가후 push 후 자동 build 테스트 확인
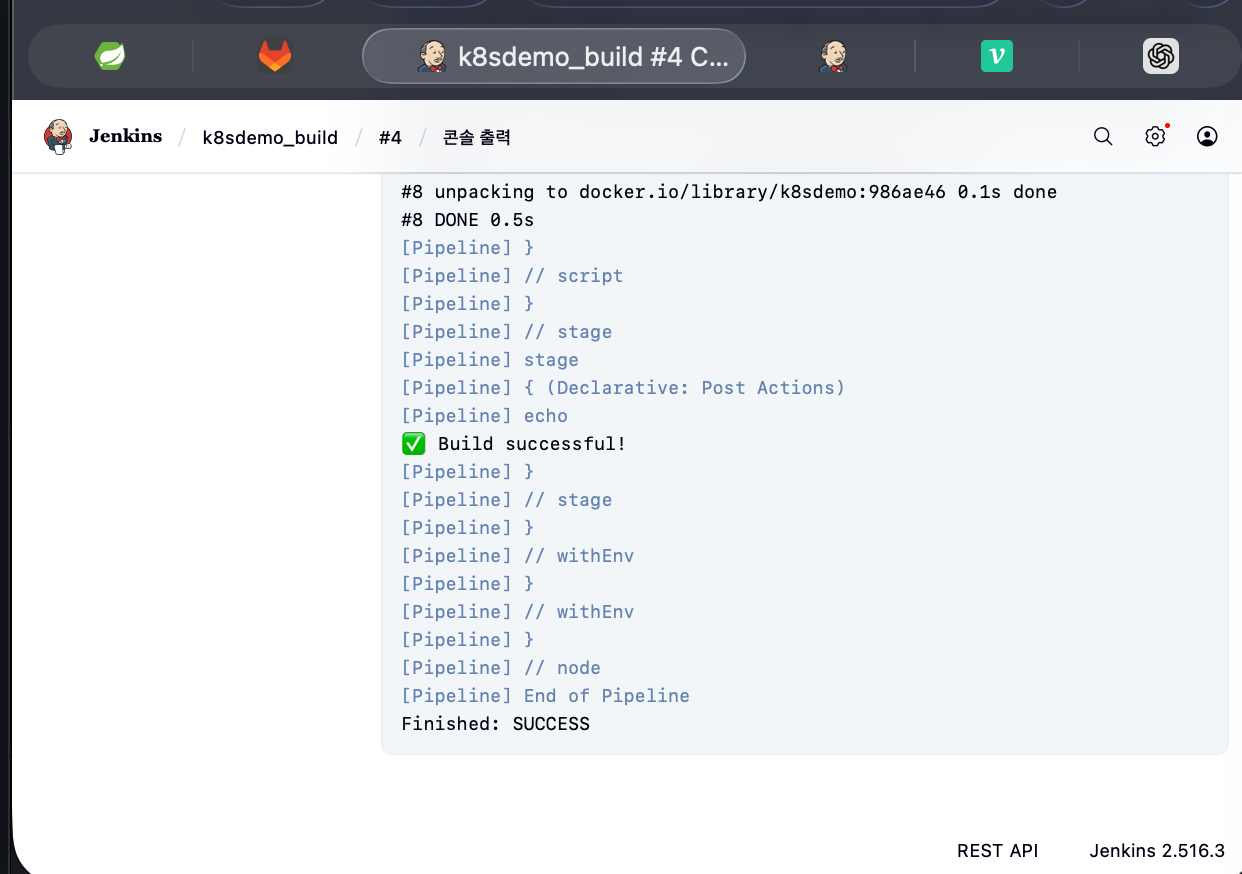
docker images | grep k8sdemo
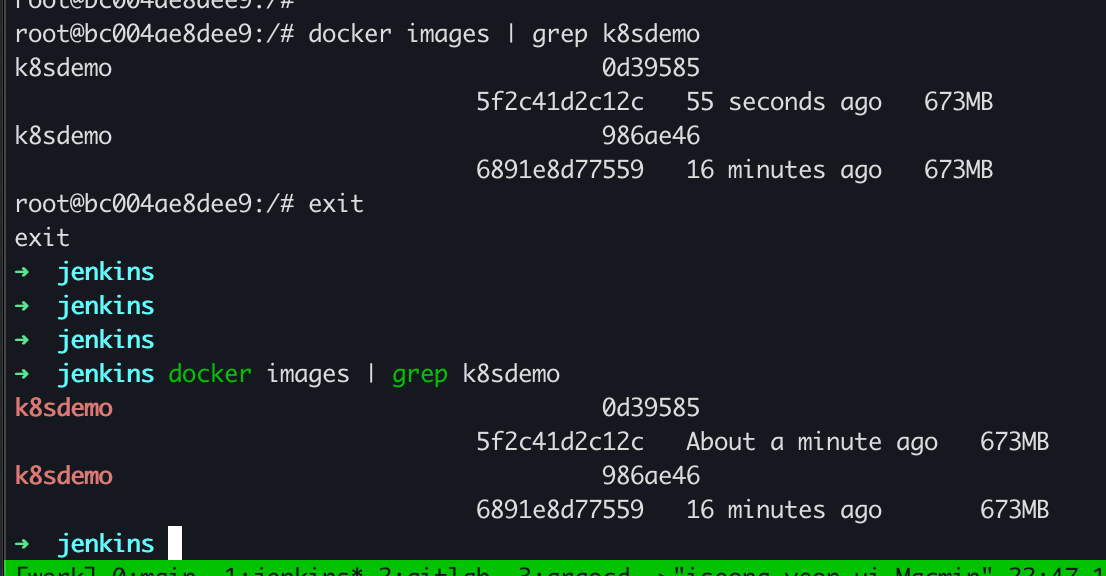
K8s-configs repo 생성
✅ 1️⃣ ArgoCD가 인식할 GitOps Repo 준비
ArgoCD는 Git 리포지토리의 YAML 정의를 감시합니다.
즉, Kubernetes 매니페스트가 담긴 별도의 Git repo (예: k8s-configs) 가 필요합니다.
예시 구조:
k8s-configs/
 ├── apps/
 │    └── k8sdemo/
 │         ├── deployment.yaml
 │         ├── service.yaml
 │         └── kustomization.yaml
 └── README.md
Gitlab 공백 프로젝트 생성
로컬로 clone
파일들 추가 apps/*
push to Gitlab from local
✅ 2️⃣ deployment.yaml 예시
apiVersion: apps/v1
kind: Deployment
metadata:
  name: k8sdemo
  labels:
    app: k8sdemo
spec:
  replicas: 1
  selector:
    matchLabels:
      app: k8sdemo
  template:
    metadata:
      labels:
        app: k8sdemo
    spec:
      containers:
        - name: k8sdemo
          image: k8sdemo:latest   # ✅ Jenkins가 빌드 후 이 부분을 자동 업데이트
          ports:
            - containerPort: 8080
ArgoCD는 이 image 값을 기준으로 배포 대상을 인식합니다.
Jenkinsfile 수정
pipeline {
  agent any
  environment {
    IMAGE_NAME = 'k8sdemo'
    GITOPS_REPO = 'git@host.docker.internal:devsungyeon/k8s-configs.git'
  }

  stages {
    stage('Checkout') {
      steps { checkout scm }
    }

    stage('Who Am I') {
      steps {
        sh 'whoami'
        sh 'ls -al ~'
        sh 'ls -al ~/.ssh || echo "⚠️ No .ssh folder found"'
      }
    }

    stage('Maven Build') {
      steps {
        echo '🔧 Building Spring Boot application...'
        sh './mvnw -B clean package -DskipTests'
      }
    }

    stage('Docker Build') {
      steps {
        script {
          def GIT_COMMIT_HASH = sh(returnStdout: true, script: 'git rev-parse --short HEAD').trim()
          env.GIT_COMMIT_HASH = GIT_COMMIT_HASH   // 🔹 후속 단계에서 접근 가능하도록 환경변수 등록
          def IMAGE_TAG = "${IMAGE_NAME}:${GIT_COMMIT_HASH}"
          sh "docker build -t ${IMAGE_TAG} ."
          sh "docker tag ${IMAGE_TAG} ${IMAGE_NAME}:latest"
        }
      }
    }

    stage('Update GitOps Repo') {
      steps {
        script {
          sh """
            echo "🔑 Registering SSH host..."
            ssh-keyscan -p 2224 host.docker.internal >> ~/.ssh/known_hosts || true

            echo "🧩 Cloning GitOps repository..."
            rm -rf k8s-configs
            bash -c "GIT_SSH_COMMAND='ssh -i ~/.ssh/id_jenkins -p 2224' git clone ${env.GITOPS_REPO}"

            cd k8s-configs/apps/k8sdemo
            echo "📝 Updating deployment.yaml with image tag ${env.GIT_COMMIT_HASH}"
            sed -i 's|image:.*|image: k8sdemo:${env.GIT_COMMIT_HASH}|' deployment.yaml

            git config --global user.email "jenkins@local"
            git config --global user.name "Jenkins CI"
            git add .
            git commit -m "Update image tag to ${env.GIT_COMMIT_HASH}" || echo "No changes to commit"

            echo "🚀 Pushing updates..."
            bash -c "GIT_SSH_COMMAND='ssh -i ~/.ssh/id_jenkins -p 2224' git push origin main"
          """
        }
      }
    }
 }

  post {
    success { echo '✅ Build and update successful!' }
    failure { echo '❌ Build failed.' }
  }
}
push 하여 테스트
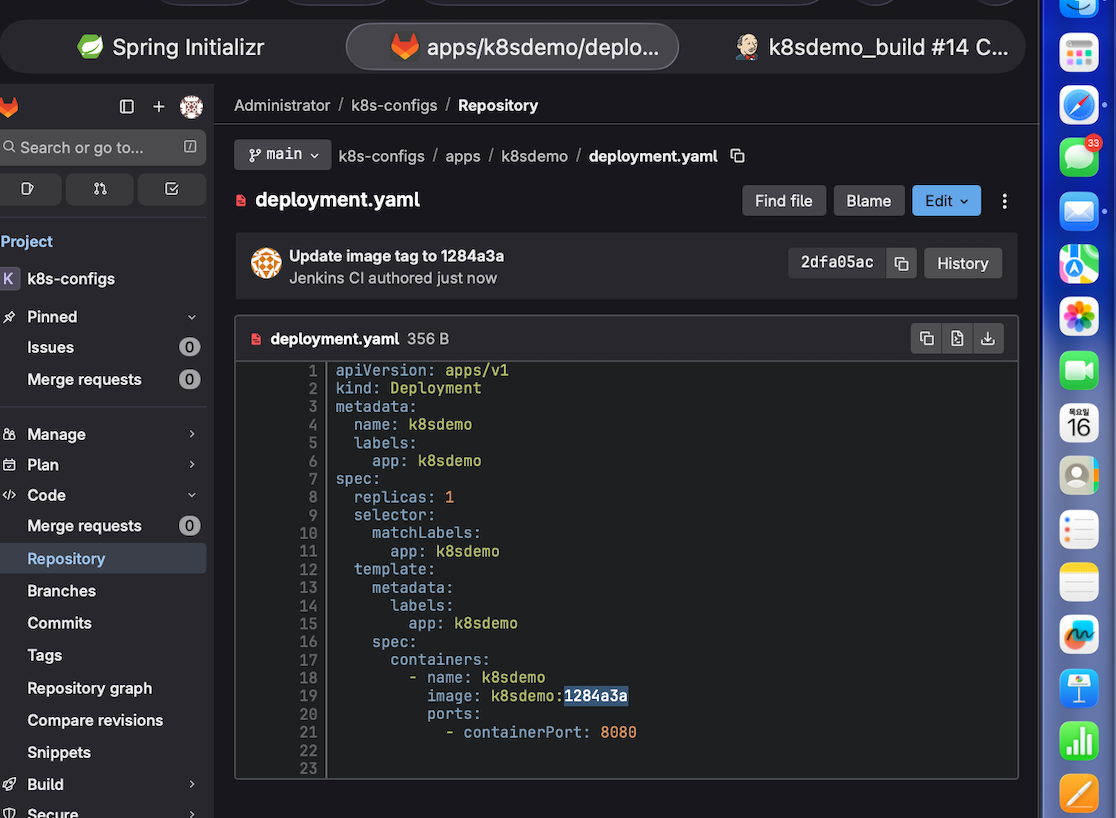
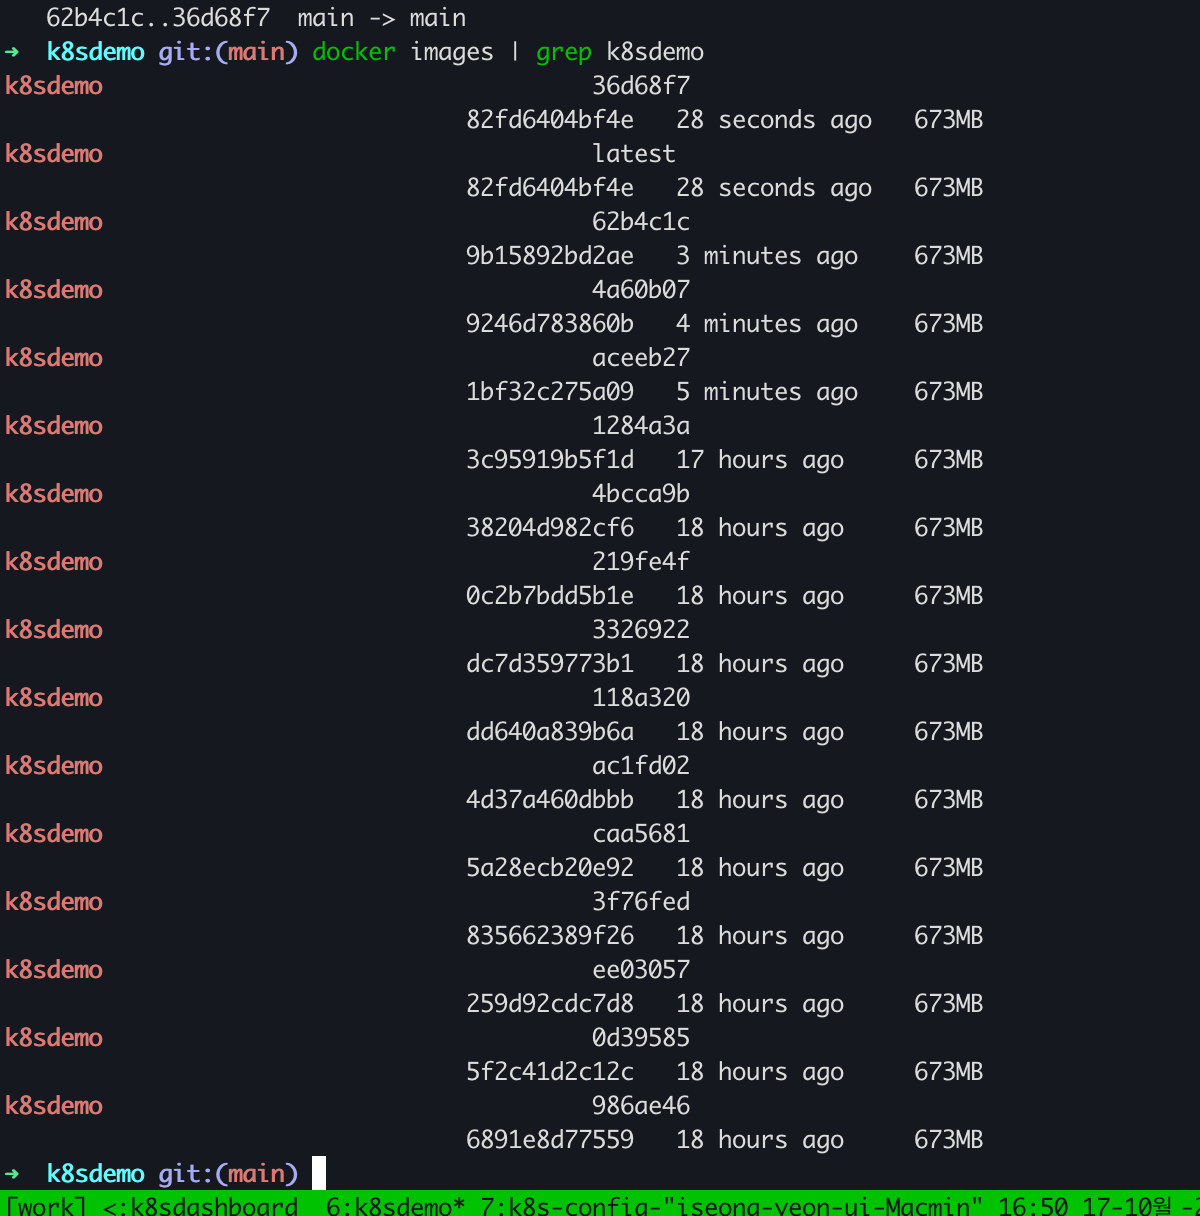
Docker image 최신 몇개만 남기고 지우기
pipeline {
  agent any
  environment {
    IMAGE_NAME = 'k8sdemo'
    GITOPS_REPO = 'git@host.docker.internal:devsungyeon/k8s-configs.git'
  }

  stages {
    stage('Checkout') {
      steps { checkout scm }
    }

    stage('Who Am I') {
      steps {
        sh 'whoami'
        sh 'ls -al ~'
        sh 'ls -al ~/.ssh || echo "⚠️ No .ssh folder found"'
      }
    }

    stage('Maven Build') {
      steps {
        echo '🔧 Building Spring Boot application...'
        sh './mvnw -B clean package -DskipTests'
      }
    }

    stage('Docker Build') {
      steps {
        script {
          def GIT_COMMIT_HASH = sh(returnStdout: true, script: 'git rev-parse --short HEAD').trim()
          env.GIT_COMMIT_HASH = GIT_COMMIT_HASH   // 🔹 후속 단계에서 접근 가능하도록 환경변수 등록
          def IMAGE_TAG = "${IMAGE_NAME}:${GIT_COMMIT_HASH}"
          sh "docker build -t ${IMAGE_TAG} ."
          sh "docker tag ${IMAGE_TAG} ${IMAGE_NAME}:latest"
        }
      }
    }

    stage('Update GitOps Repo') {
      steps {
        script {
          sh """
            echo "🔑 Registering SSH host..."
            ssh-keyscan -p 2224 host.docker.internal >> ~/.ssh/known_hosts || true

            echo "🧩 Cloning GitOps repository..."
            rm -rf k8s-configs
            bash -c "GIT_SSH_COMMAND='ssh -i ~/.ssh/id_jenkins -p 2224' git clone ${env.GITOPS_REPO}"

            cd k8s-configs/apps/k8sdemo
            echo "📝 Updating deployment.yaml with image tag ${env.GIT_COMMIT_HASH}"
            sed -i 's|image:.*|image: k8sdemo:${env.GIT_COMMIT_HASH}|' deployment.yaml

            git config --global user.email "jenkins@local"
            git config --global user.name "Jenkins CI"
            git add .
            git commit -m "Update image tag to ${env.GIT_COMMIT_HASH}" || echo "No changes to commit"

            echo "🚀 Pushing updates..."
            bash -c "GIT_SSH_COMMAND='ssh -i ~/.ssh/id_jenkins -p 2224' git push origin main"
          """
        }
      }
    }
  }

  post {
    success {
      // 수정 부분
      echo '✅ Build and update successful!'
      echo '✅ Build and update successful!'
      sh '''
        echo "🧹 Cleaning up old Docker images..."
        # 최근 3개의 k8sdemo 이미지만 남기고 나머지는 삭제
        docker images k8sdemo --format "" | tail -n +4 | xargs -r docker rmi -f || true
        docker image prune -f
      '''
    }
    failure { echo '❌ Build failed.' }
  }
}

Argocd 설치
✅ 1️⃣ ArgoCD 설치 (Kubernetes 환경에 설치)
🔹 ① 네임스페이스 생성
kubectl create namespace argocd
🔹 ② 공식 매니페스트로 설치
kubectl apply -n argocd -f https://raw.githubusercontent.com/argoproj/argo-cd/stable/manifests/install.yaml
🔹 ③ 설치 확인
kubectl get pods -n argocd
→ argocd-server, argocd-repo-server, argocd-dex-server 등이
Running 상태가 될 때까지 기다립니다 (1~2분 정도).

✅ 2️⃣ ArgoCD 웹 접속 설정
🔹 ① 서비스 확인
kubectl get svc -n argocd
보통 이렇게 나옵니다:
NAME                    TYPE        CLUSTER-IP       EXTERNAL-IP   PORT(S)             AGE
argocd-server           ClusterIP   10.101.120.41    <none>        80/TCP,443/TCP      2m
argocd-repo-server      ClusterIP   10.101.218.90    <none>        8081/TCP,8084/TCP   2m
...
🔹 ② 포트포워딩으로 로컬 접속
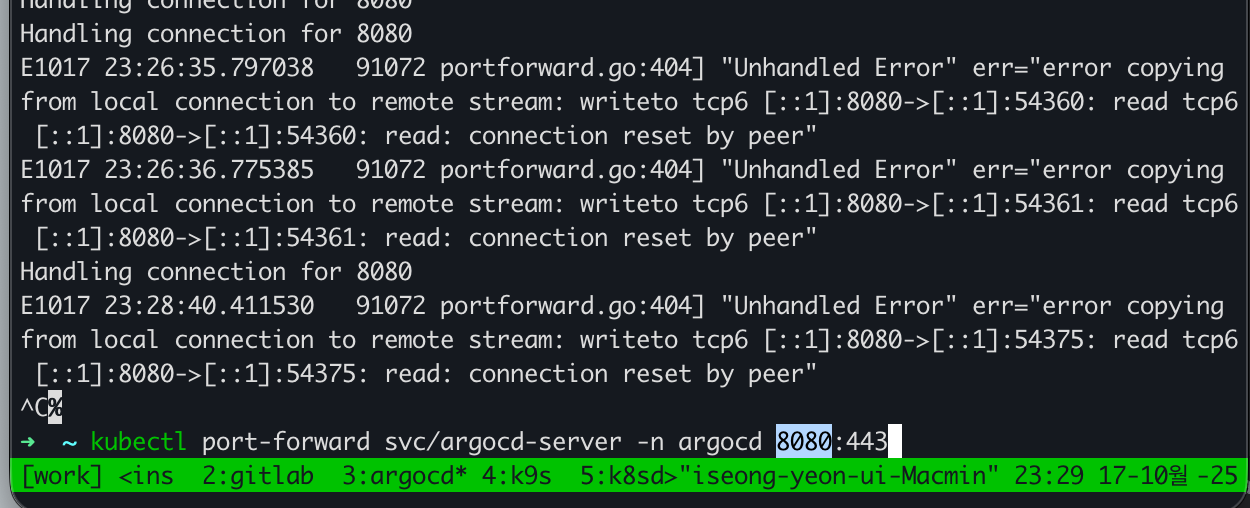
kubectl port-forward svc/argocd-server -n argocd 8080:443
➡ 브라우저에서 접속: 👉 https://localhost:8080
✅ 3️⃣ 로그인 정보 확인
초기 사용자:
Username: admin
비밀번호:
kubectl -n argocd get secret argocd-initial-admin-secret -o jsonpath="{.data.password}" | base64 -d; echo
이제 UI에서 로그인 가능합니다 🎯
✅ 4️⃣ 자동 로그인 (선택)
CLI에서 로그인할 수도 있어요:
argocd login localhost:8080 \
  --username admin \
  --password $(kubectl -n argocd get secret argocd-initial-admin-secret -o jsonpath="{.data.password}" | base64 -d) \
  --insecure
argocd login localhost:8080 --username admin --password <혹은 변경비밀번호> --insecure
✅ 5️⃣ ArgoCD 설치 확인
argocd version
argocd app list
→ 버전과 서버 연결이 정상적으로 출력되면 성공입니다.
ArgoCD에 k8sdemo 애플리케이션 등록 → 자동 배포 연결
✅ 1️⃣ GitOps Repo 구조 확인
지금 k8s-configs 리포지토리에 deployment.yaml만 있죠.
ArgoCD는 하나의 앱 단위로 deployment + service + kustomization 구성이 필요합니다.
📁 폴더 구조를 이렇게 만들어주세요 👇
k8s-configs/
└── apps/
    └── k8sdemo/
        ├── deployment.yaml
        ├── service.yaml
        └── kustomization.yaml
✅ 2️⃣ service.yaml 생성
apiVersion: v1
kind: Service
metadata:
  name: k8sdemo
  labels:
    app: k8sdemo
spec:
  type: NodePort
  selector:
    app: k8sdemo
  ports:
    - protocol: TCP
      port: 8080
      targetPort: 8080
      nodePort: 30080
✅ 3️⃣ kustomization.yaml 생성
apiVersion: kustomize.config.k8s.io/v1beta1
kind: Kustomization
resources:
  - deployment.yaml
  - service.yaml
ArgoCD는
kustomization.yaml을 기준으로 해당 폴더를 “앱 단위”로 인식합니다.
✅ 4️⃣ GitLab에 커밋 & 푸시
로컬에서 아래처럼 커밋해 주세요 👇
git add apps/k8sdemo/service.yaml apps/k8sdemo/kustomization.yaml
git commit -m "Add service and kustomization for ArgoCD"
git push
Argocd repo add
argocd repo add http://host.docker.internal:8929/devsungyeon/k8s-configs.git
–username devsungyeon
–password glpat-chuT4RQ_Yv-rzTPADG4JrG86MQp1OjEH.01.0w0yjr3g6
–insecure-skip-server-verification
password는 personal access token
✅ 5️⃣ ArgoCD 앱 등록 (CLI 방식)
K8s-configs repo 디렉토리에서 수행
argocd app create k8sdemo \
  --repo http://host.docker.internal:8929/devsungyeon/k8s-configs.git \
  --path apps/k8sdemo \
  --dest-server https://kubernetes.default.svc \
  --dest-namespace default \
  --sync-policy automated
🔹
--sync-policy automated: Git 변경 시 자동 배포 🔹--path apps/k8sdemo: 우리가 만든 폴더 경로
✅ 6️⃣ 상태 확인
argocd app list
argocd app get k8sdemo
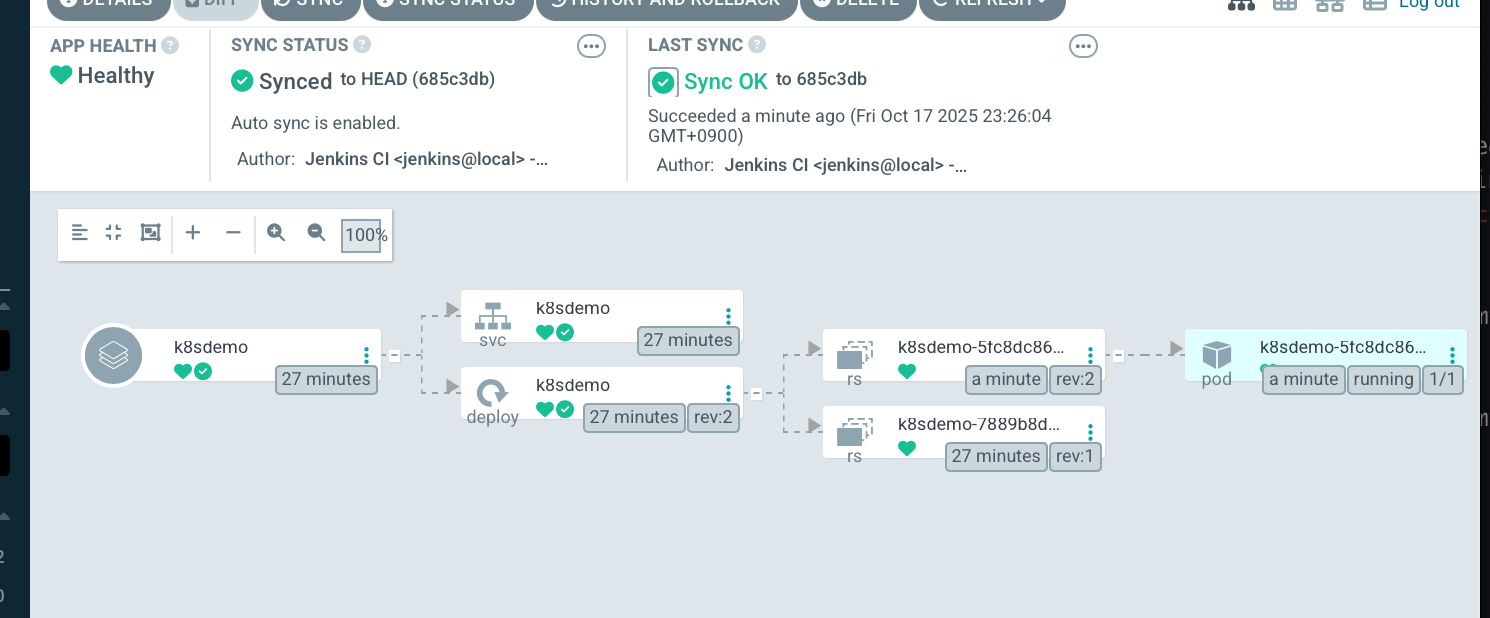
→ STATUS: Synced / HEALTH: Healthy
가 나오면 Kubernetes에 배포가 완료된 상태입니다.
✅ 7️⃣ 배포 확인
kubectl get pods
kubectl get svc
→ k8sdemo Deployment 및 Service가 실제로 생성되어 있으면 성공 🎯
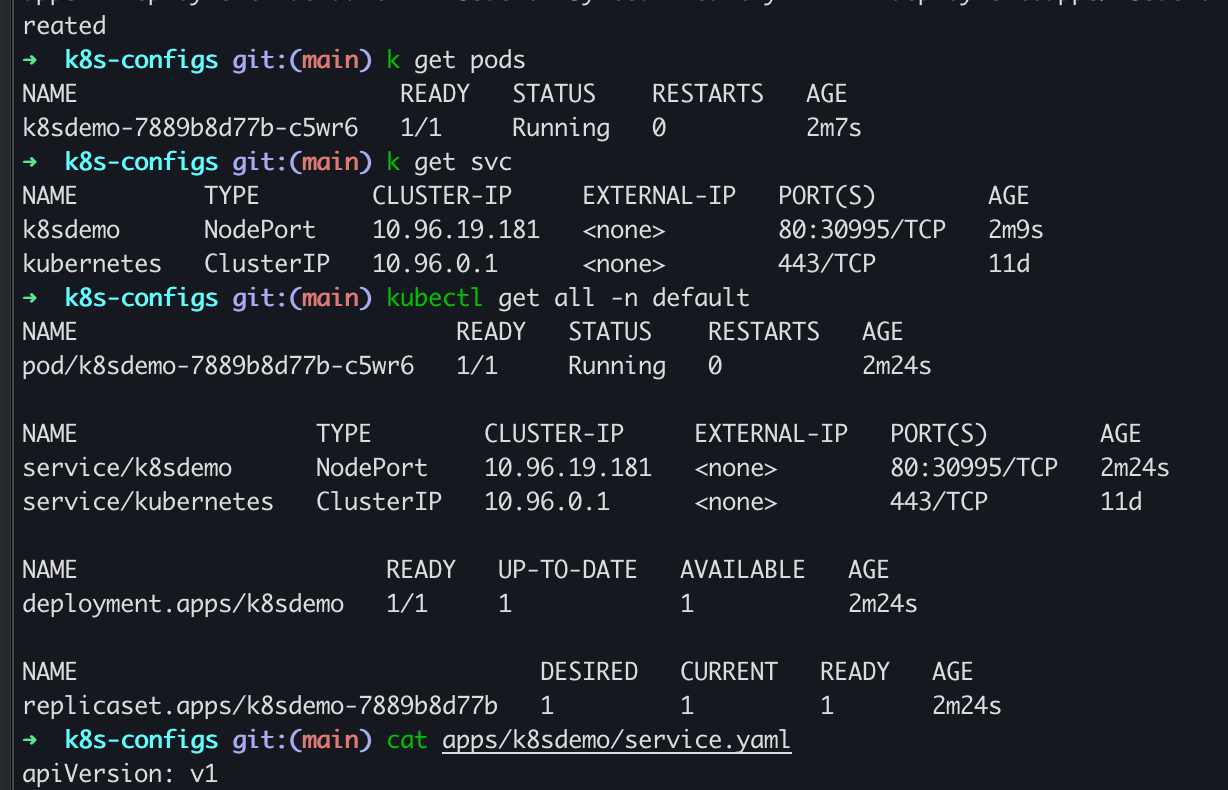
지금 kubectl get all 결과를 보면:
service/k8sdemo NodePort 80:30995/TCP
즉, 외부 접근 포트가 30995로 자동 할당된 상태예요.
✅ 바로 접근 방법
🖥 Docker Desktop Kubernetes 사용 중이라면:
로컬 브라우저에서 아래 주소 입력 👇
http://localhost:30995
이게 바로
k8sdemo의 Spring Boot 서버 주소입니다.
최종 단계
/hello push해서 반영 테스트 해보기
✅ 1️⃣ Controller 추가
src/main/java/.../controller/HelloController.java 파일을 새로 만드세요.
package com.example.k8sdemo.controller;

import org.springframework.web.bind.annotation.GetMapping;
import org.springframework.web.bind.annotation.RestController;

@RestController
public class HelloController {

    @GetMapping("/hello")
    public String hello() {
        return "Hello from k8sdemo!";
    }
}
⚙️ 2️⃣ 로컬에서 먼저 테스트
Spring Boot 로컬 실행 포트 변경
application.properties 또는 application.yml에 포트를 임시로 바꾸세요.
📄 src/main/resources/application.properties
server.port=8085
그 후 실행:
./mvnw spring-boot:run
접속:
http://localhost:8085/hello
그리고 push 하여 테스트.
접속:
http://localhost:30995/hello

아니면, 기존 argocd 포트를 다른걸로 변경해도 됨

🐳 Kubernetes에 PostgreSQL 추가하기 (with Spring Boot)
/hello배포 후 Postgres DB를 추가하고, Spring Boot에서 연결 테스트하는 단계
✅ 1️⃣ kustomization.yaml 수정
postgres 관련 리소스를 함께 관리하도록 추가
apiVersion: kustomize.config.k8s.io/v1beta1
kind: Kustomization
resources:
  - deployment.yaml
  - service.yaml
  - postgres-deployment.yaml
  - postgres-service.yaml
✅ 2️⃣ postgres-deployment.yaml 추가
PersistentVolumeClaim + Postgres Deployment 설정
apiVersion: v1
kind: PersistentVolumeClaim
metadata:
  name: postgres-pvc
  namespace: default
spec:
  accessModes:
    - ReadWriteOnce
  resources:
    requests:
      storage: 1Gi
---
apiVersion: apps/v1
kind: Deployment
metadata:
  name: postgres
  namespace: default
spec:
  selector:
    matchLabels:
      app: postgres
  template:
    metadata:
      labels:
        app: postgres
    spec:
      containers:
        - name: postgres
          image: postgres:15
          ports:
            - containerPort: 5432
          env:
            - name: POSTGRES_DB
              value: k8sdemo
            - name: POSTGRES_USER
              value: demo
            - name: POSTGRES_PASSWORD
              value: demo1234
          volumeMounts:
            - name: postgres-storage
              mountPath: /var/lib/postgresql/data
      volumes:
        - name: postgres-storage
          persistentVolumeClaim:
            claimName: postgres-pvc
✅ 3️⃣ postgres-service.yaml 추가
Spring Boot 애플리케이션이 내부 ClusterIP로 접근할 수 있도록 설정
apiVersion: v1
kind: Service
metadata:
  name: postgres-service
  namespace: default
spec:
  type: ClusterIP
  selector:
    app: postgres
  ports:
    - port: 5432
      targetPort: 5432
✅ 4️⃣ pom.xml 수정
PostgreSQL JDBC 드라이버 의존성 추가
<dependency>
  <groupId>org.postgresql</groupId>
  <artifactId>postgresql</artifactId>
  <version>42.7.2</version>
</dependency>
✅ 5️⃣ application.properties 수정
Spring Boot에서 Postgres 연결 설정
spring.datasource.url=jdbc:postgresql://postgres-service:5432/k8sdemo
spring.datasource.username=demo
spring.datasource.password=demo1234
spring.datasource.driver-class-name=org.postgresql.Driver

# JPA 설정 (선택)
spring.jpa.hibernate.ddl-auto=update
spring.jpa.show-sql=true
spring.jpa.properties.hibernate.dialect=org.hibernate.dialect.PostgreSQLDialect
Db connection test
package com.example.k8sdemo.controller;

import com.example.k8sdemo.entity.TestEntity;
import com.example.k8sdemo.repository.TestRepository;
import org.springframework.web.bind.annotation.GetMapping;
import org.springframework.web.bind.annotation.RestController;

@RestController
public class TestController {
    private final TestRepository repo;

    public TestController(TestRepository repo) {
        this.repo = repo;
    }

    @GetMapping("/health/db")
    public String checkDb() {
        repo.save(new TestEntity("ok"));
        long count = repo.count();
        return "✅ DB Connected! (rows=" + count + ")";
    }
}
참고) Git clone
git clone (localPC에서 Docker Gitlab으로) :
git clone ssh://git@localhost:2224/devsungyeon/k8sdemo.git
알고리즘 기본 이름이 아닌, 다른 이름으로 지정했을 경우,
GIT_SSH_COMMAND='ssh -i ~/.ssh/id_jenkins -p 2224' git clone git@localhost:devsungyeon/k8sdemo.git
GIT_SSH_COMMAND=’ssh -i ~/.ssh/id_jenkins -p 2224’ git clone git@host.docker.internal:devsungyeon/k8sdemo.git

댓글남기기